
Splunk is one of the most popular SEIM (security information and event management) platforms. It provides advanced capabilities like gathering, analyzing and visualizing machine generated data. It also helps to set up cloud and physical systems that can get insights into useful information in real time. To leverage all these benefits, one must know how to install Splunk on their system.
Therefore, we are here with the complete guide to Splunk installation on different operating systems. This guide covers all the essential system requirements as well as steps of installing Splunk 9.2.1 (the most used version). Let's begin!
Explore igmGuru's Big Data Certification Courses to become pro in data.
The Splunk Enterprise has its own set of hardware requirements. One must understand them before jumping into the installation process. Administrative access is needed to install this software. See the following requirements to know where you can install Splunk -
| Operating System | Splunk Enterprise | Splunk Universal Forwarder | Splunk SOAR (On-Premises) |
| Ubuntu (Linux) | Yes | Yes | No |
| Other Linux Distributions (RHEL, CentOS, SUSE, Debian, etc.) | Yes | Yes | (RHEL, Amazon Linux, Oracle Linux) |
| Windows Server | Yes | Yes | No |
| Windows 10/11 | Yes | Yes | No |
| Hardware | Minimum Requirements | Recommended (Production) |
| CPU | 8 cores | 16 or more |
| RAM | 8 GB | 32 GB or more |
| Disk Space | Adequate for installation and data storage | Varies significantly |
| Port | Purpose |
| 8000 (default) | Splunk Web UI |
| 9997 (default) | Data forwarding (Splunk to Splunk, Universal Forwarder to Splunk) |
Installing this software on a Linux system is a very easy process. It just requires one to consider some prerequisites and follow a multi-step process. We have already discussed the prerequisites in the above section. Let us discuss how to download and install Splunk on Linux -
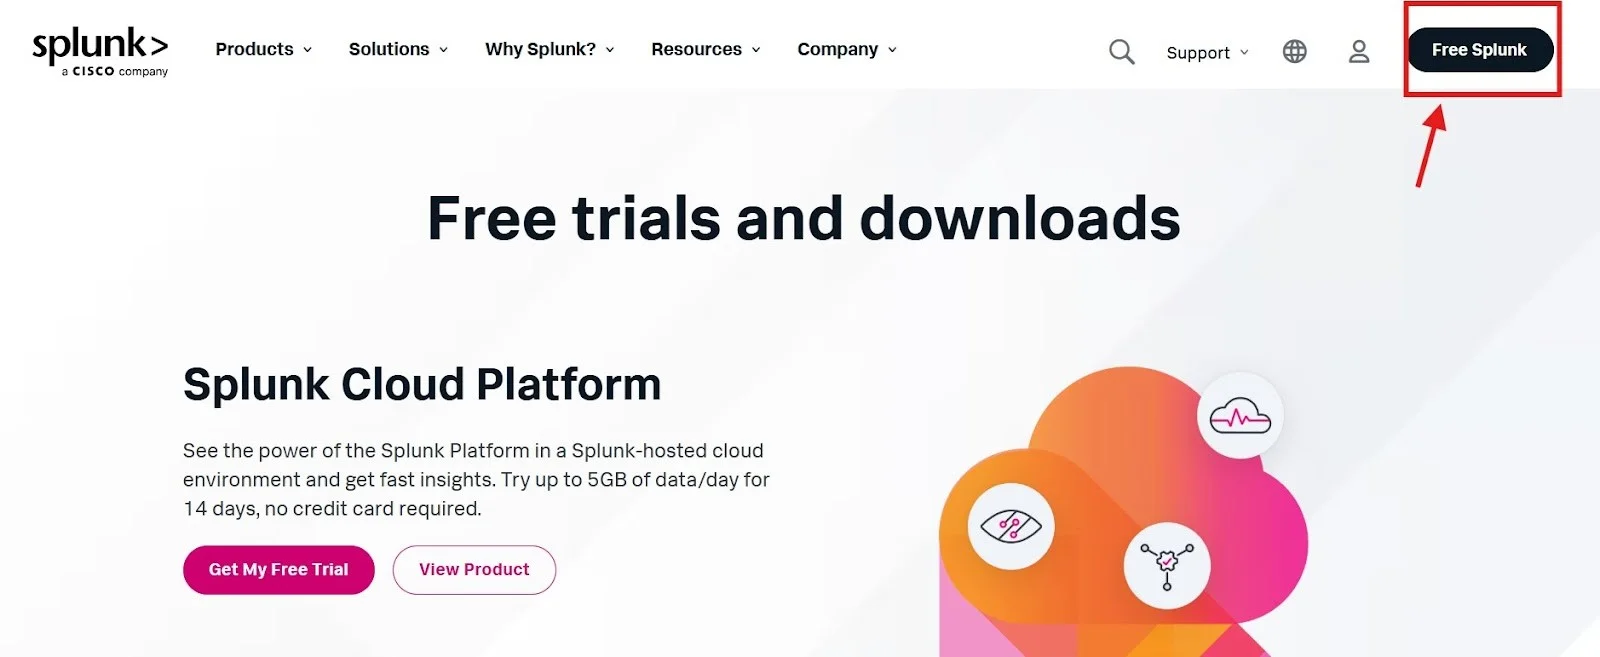
Step 1- Go to the official website and click on the Free Splunk options as shown below -
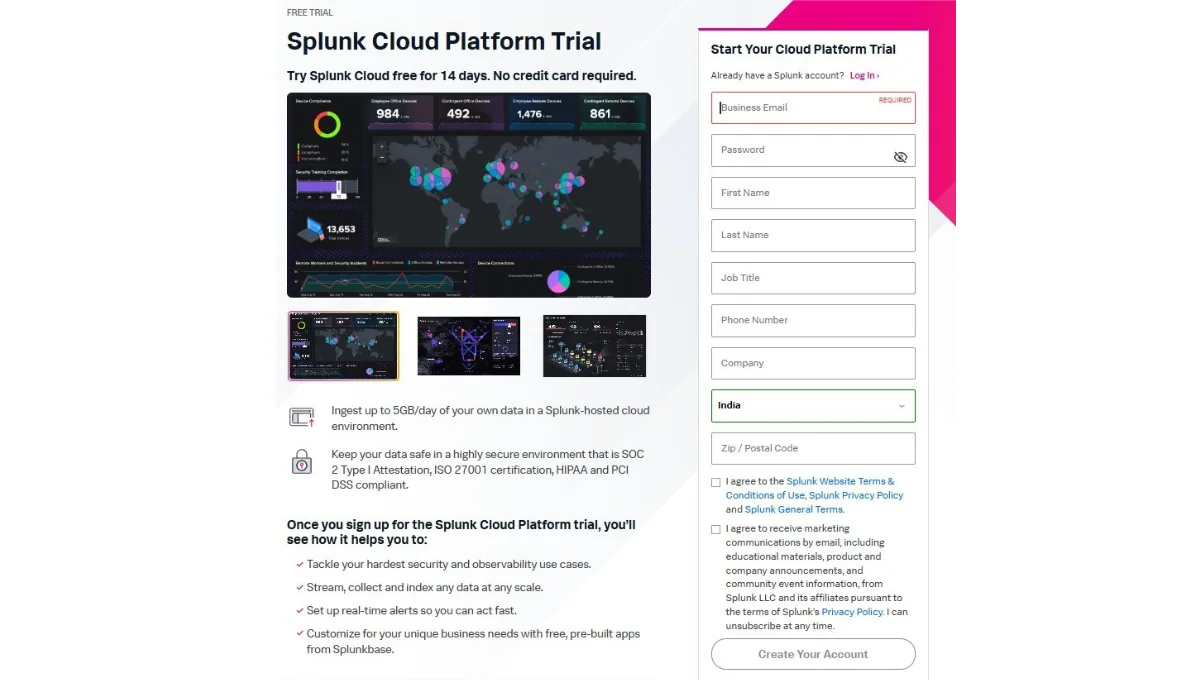
Step 2- This will open a form as shown below. Fill in all the details, check user agreements and choose the Create Your Account button.
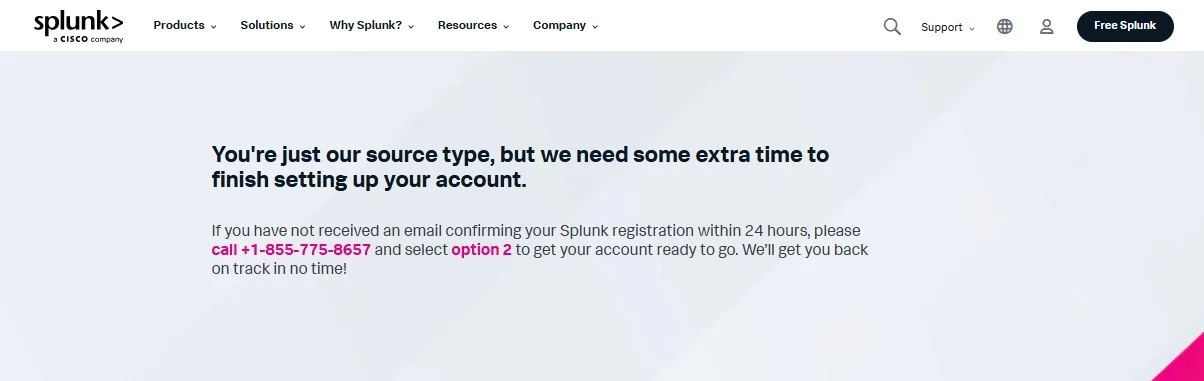
Step 3- The officials will check your details to create a new account. This might take some time. You will definitely have the confirmation email in 24 hours.
Step 4- Login to your Splunk account and go to the download page once you receive the confirmation email. Click on the download button as shown below -
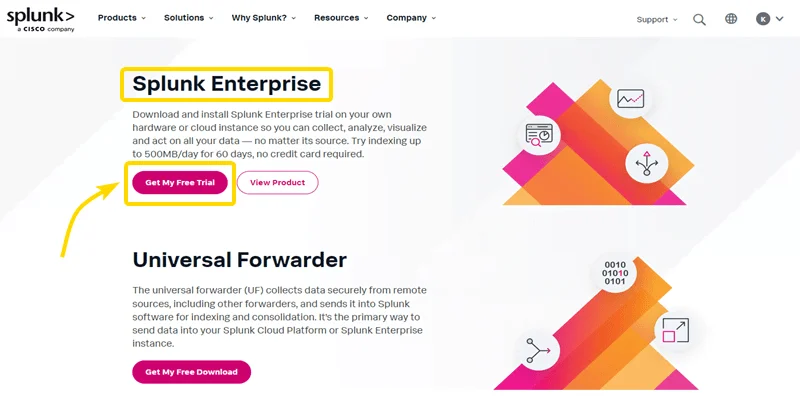
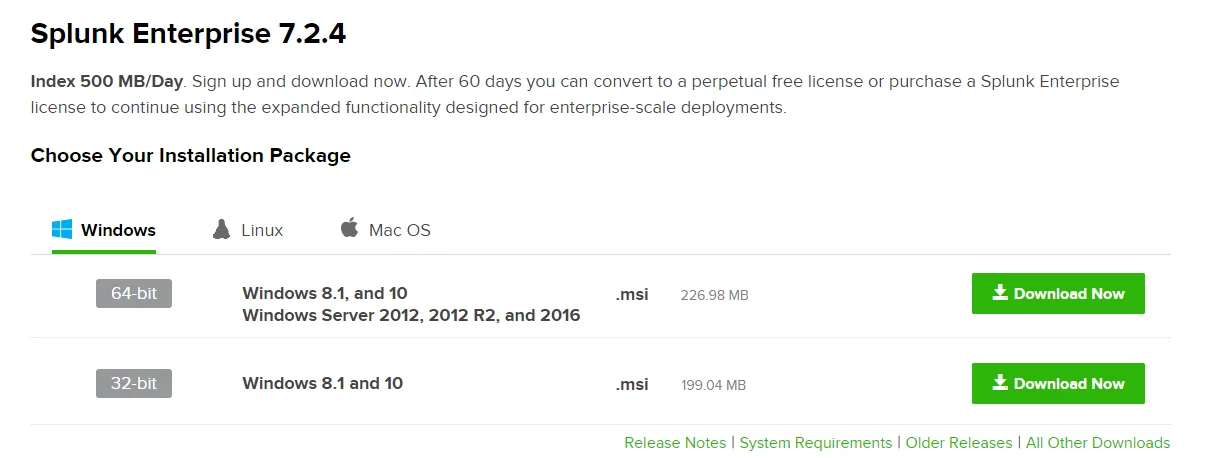
 Step 5- This will show many versions on your screen. We are downloading the Splunk Enterprise version. Click on Get My Free Trial button to start downloading.
Step 6- Select the Linux Tab and choose the .tgz file to download.

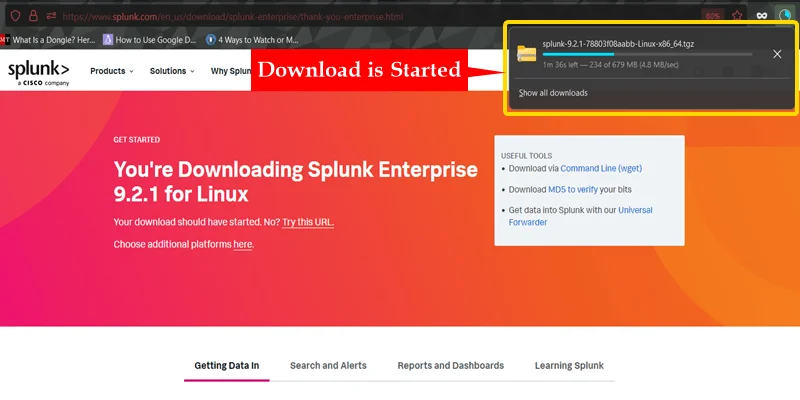
Step 7- This will start downloading the file.
Related Article- Top Splunk Interview Questions And Answers
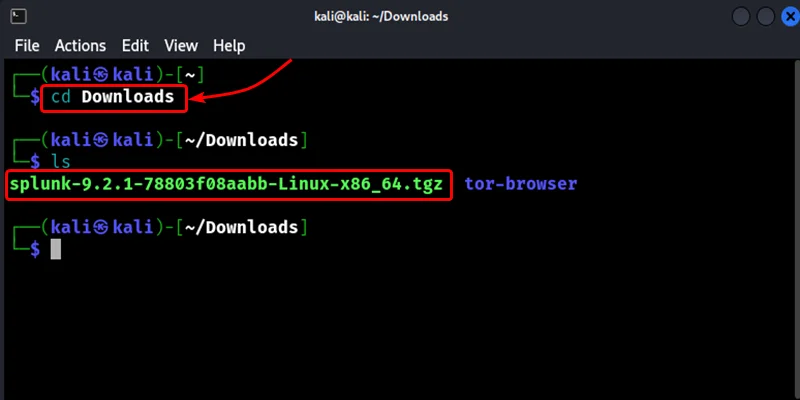
Step 1. Navigate the executable file - Go to the Downloads Folder and navigate the file you have just downloaded. Open the terminal and grove the following command -
| cd Downloads |
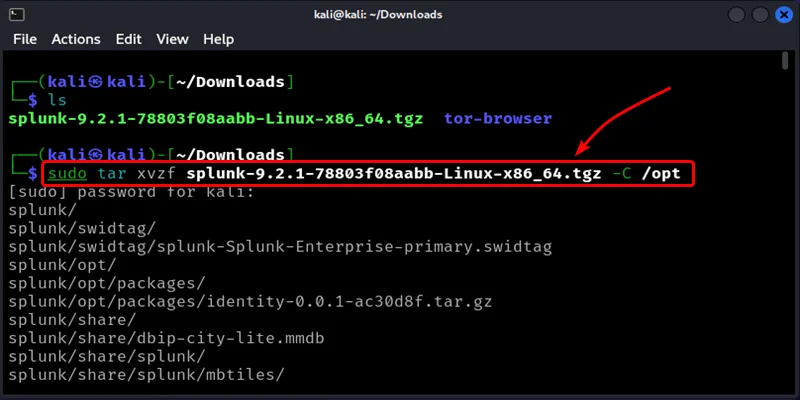
Step 2. Extract the file - Use the command given below to extract the executable file. It will be in /opt directory as it is a standard location on Linux for installing any software packages.
sudo tar xvzf splunk-9.2.1-78803f08aabb-Linux-x86_64.tgz -C /opt |
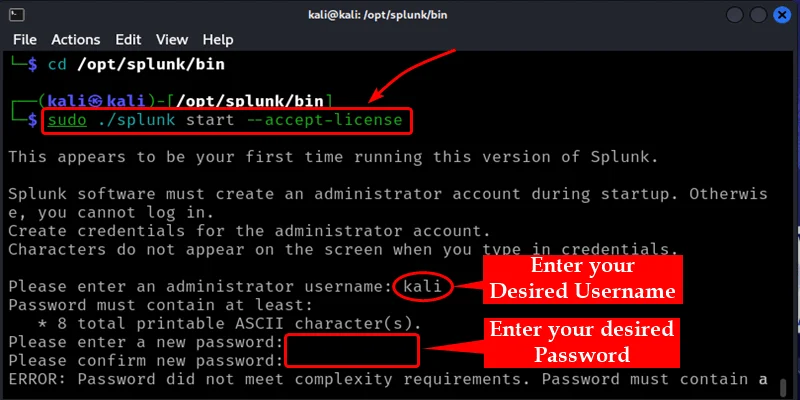
Step 3. Change the directory - Change the official directory where programming files are available with the following command -
cd /opt/splunk/bin |

Step 4. Create a username & password and accept the license - It is important to accept the license agreement in order to start the Splunk server. Use the command given below to agree with license policies. This will ask you to create a username and password. These will be the credentials to log in to the Splunk server.
sudo ./splunk start --accept-license |
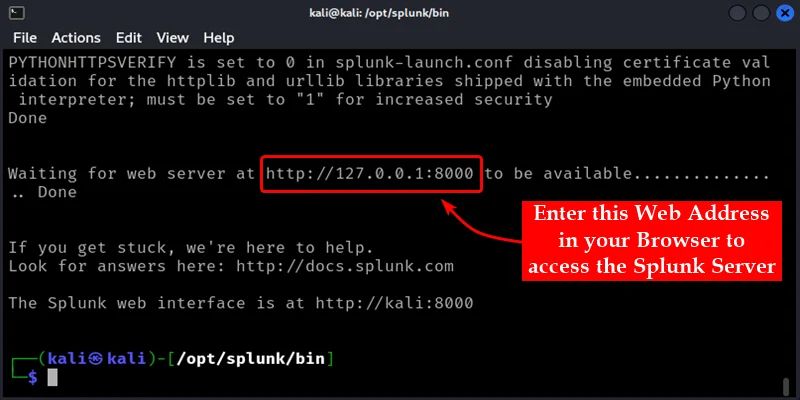
Step 5. Access the server through a Browser- A web address will pop up on the terminal after creating a username and password. Use this address to access the Splunk server in a browser.
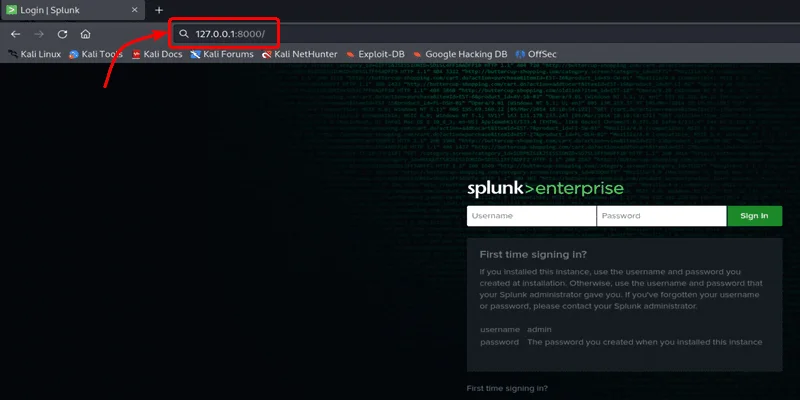
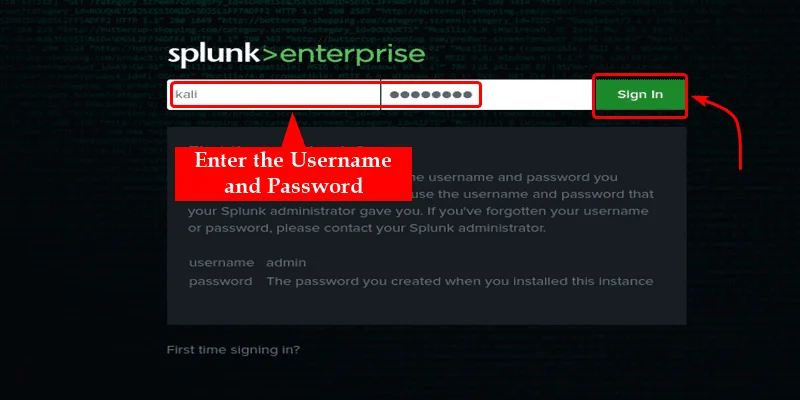
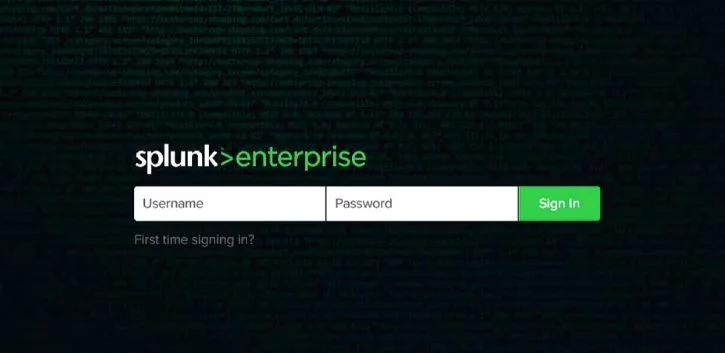
Step 6. Sign in to the Server - This will open a new page asking to give the credentials. Enter the same credentials that we have created in the 4th step.
Related Article- Splunk Tutorial- A Complete Guide For Beginners
Installing this software on a Windows system is generally considered easier than some other softwares. It is still important to follow the steps carefully. This section will guide you through the process of how to install Splunk on Windows.
The downloading process is the same as Linux. You just have to select the right version in step 6 from the Windows section. You can choose any file that is most suitable for you.
Step 1. Navigate the executable file - Go to the Downloads Folder and navigate the file that you have just downloaded. Now run this file.
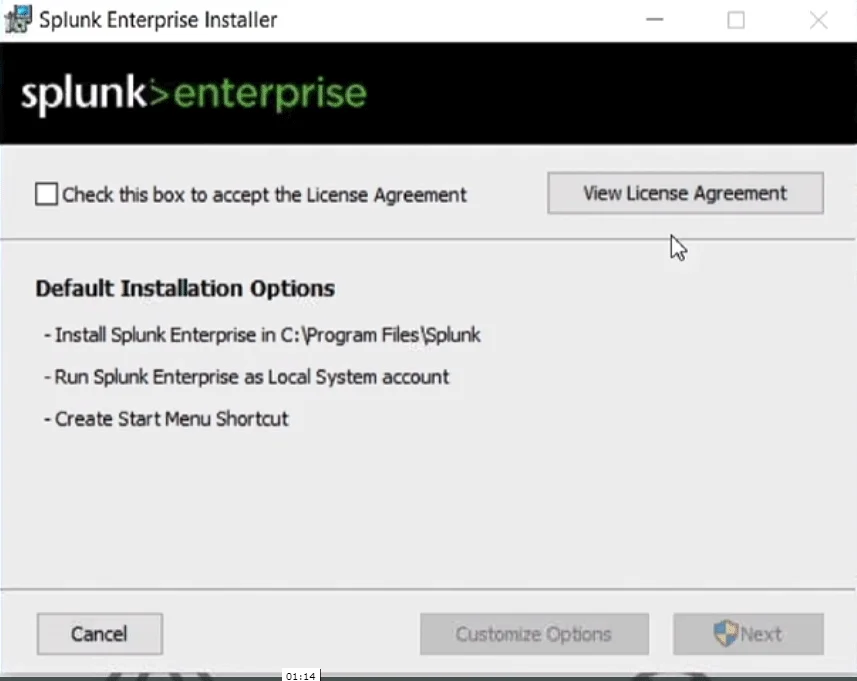
Step 2. Agree to user agreement - This will open a window for showing the license and user agreement. Agree by clicking on the checkbox. Now you will see Customize Options and a Next button. Use the Customize Options button to choose the folder for installation and click on Next to continue the process.
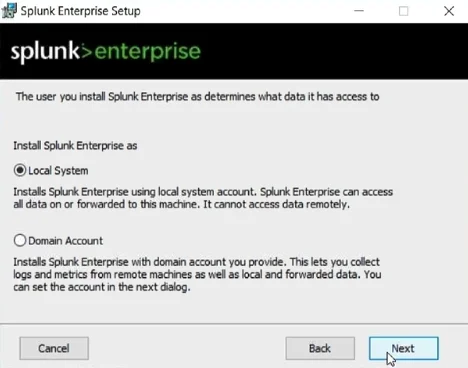
Step 3. This will open a new window with two options as given below. We are choosing the local system in this instance. Select the local system and click on the Next button.
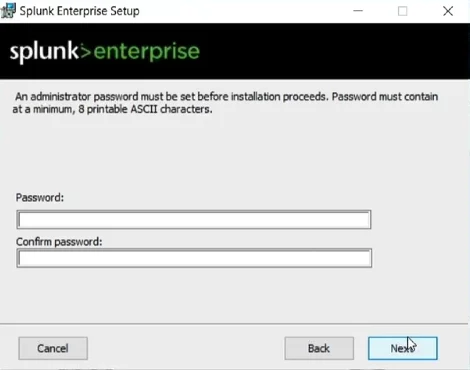
Step 4. Now, you have to create a password to login into your Splunk instance. Create a strong one and do not forget it.
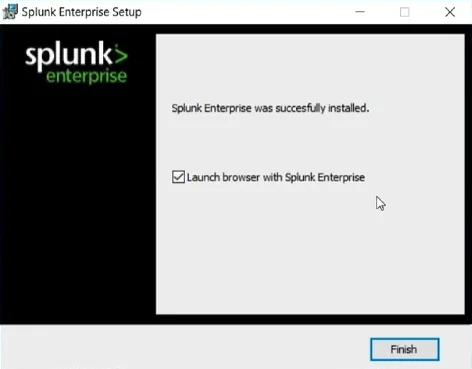
Step 5. Now, you will see a confirmation window as shown below. Tap on the Finish button.
Step 6. Open your Splunk instance. You can open it from the Windows programs or by using localhost:8000 through the web browser. The username of administrators is always Admin and the password will be different as we have just created.
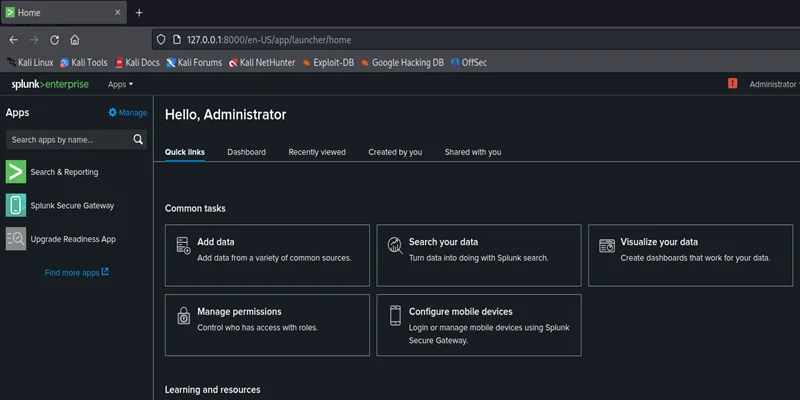
Successfully installing Splunk on both Windows and Linux softwares unlocks powerful log management and analysis capabilities. Anyone can effectively install this software on their system with this guide. This instance unlocks many capabilities like robust data ingestion, insightful searching and the creation of valuable dashboards. This ultimately leads to a better understanding and management of system data.
It can be installed for free but with some limitations. This free version will be available for a specific time period and only give a few capabilities. The Free Splunk Enterprise lasts for 60 days while Free Splunk Cloud software lasts for 15 days.
Companies use this software to analyze and visualize machine-generated data. It also extracts valuable insights from this data. It is used for many processes including business analytics, web analytics, application management, compliance and security
Companies that want to analyze and manage large amounts of data use this platform. This includes IT departments, businesses that use IoT devices and organizations that want to detect incidents and risks.
Course Schedule
| Course Name | Batch Type | Details |
| Splunk Training | Every Weekday | View Details |
| Splunk Training | Every Weekday | View Details |