Java remains one of the most widely used programming languages for building enterprise applications, Spring Boot APIs, cloud-native Java services, and scalable microservices. Modern Java development is heavily used with tools and platforms like Docker, Kubernetes, Maven, Gradle, IntelliJ IDEA, and VS Code, making Java a core part of today's JVM ecosystem.
The industry standard for production stability is Java 21 LTS, while Java 25 is the latest feature release for developers who want access to newer Java capabilities. Understanding the system requirements is the first step, especially when preparing for high-value development using resource-intensive Integrated Development Environments (IDEs).
| System Requirement | Windows | macOS | Linux (64-bit) |
| Operating System | Windows 10 or 11 (64-bit recommended). | macOS 12 Monterey or later recommended. | Any modern 64-bit distribution (Ubuntu, Debian, Fedora, RHEL). |
| Processor (CPU) | Dual Core, 2 GHz or faster. Core i5/i7 equivalent or newer recommended for development. | Intel-based Mac (x64) or Apple M-series (ARM64). Dual Core, 2 GHz or faster recommended. | Dual Core, 2 GHz or faster recommended for development. x64 or ARM64 architecture. |
| RAM (Memory) | Minimum 8 GB. For enterprise development with IDEs (e.g., IntelliJ), 8 GB or more is highly recommended. | Minimum 8 GB. For enterprise development with IDEs, 8 GB or more is highly recommended. | Minimum 8 GB. For enterprise development with IDEs, 8 GB or more is highly recommended. |
| Disk Space | Minimum 300 MB for JDK, plus 10 GB+ for IDEs, projects, and large build caches. | Minimum 300 MB for JDK, plus 20 GB+ recommended for IDEs, containers, build tools, and development environments. | Minimum 300 MB for JDK, plus 20 GB+ recommended for IDEs, containers, build tools, and development environments. |
| User Privileges | Administrator privileges required for installation and environment setup. | Administrator privileges are required for installation. | Root or sudo Access required to install software. |
Modern Java development environments often include tools like IntelliJ IDEA, VS Code, Docker Desktop, Maven, Gradle, and Kubernetes CLI utilities. Because of this, developers working on Spring Boot microservices or cloud-native Java applications should ideally use systems with at least 16 GB RAM for smoother performance.
We focus on installing a modern, open-source distribution like Eclipse Temurin (provided by the Eclipse Adoptium community), which is a TCK-certified and enterprise-ready version of OpenJDK.
Go to the Eclipse Temurin website. Select Java 25 (LTS) and the Windows x64 architecture. Download the .msi installer for the simplest setup.
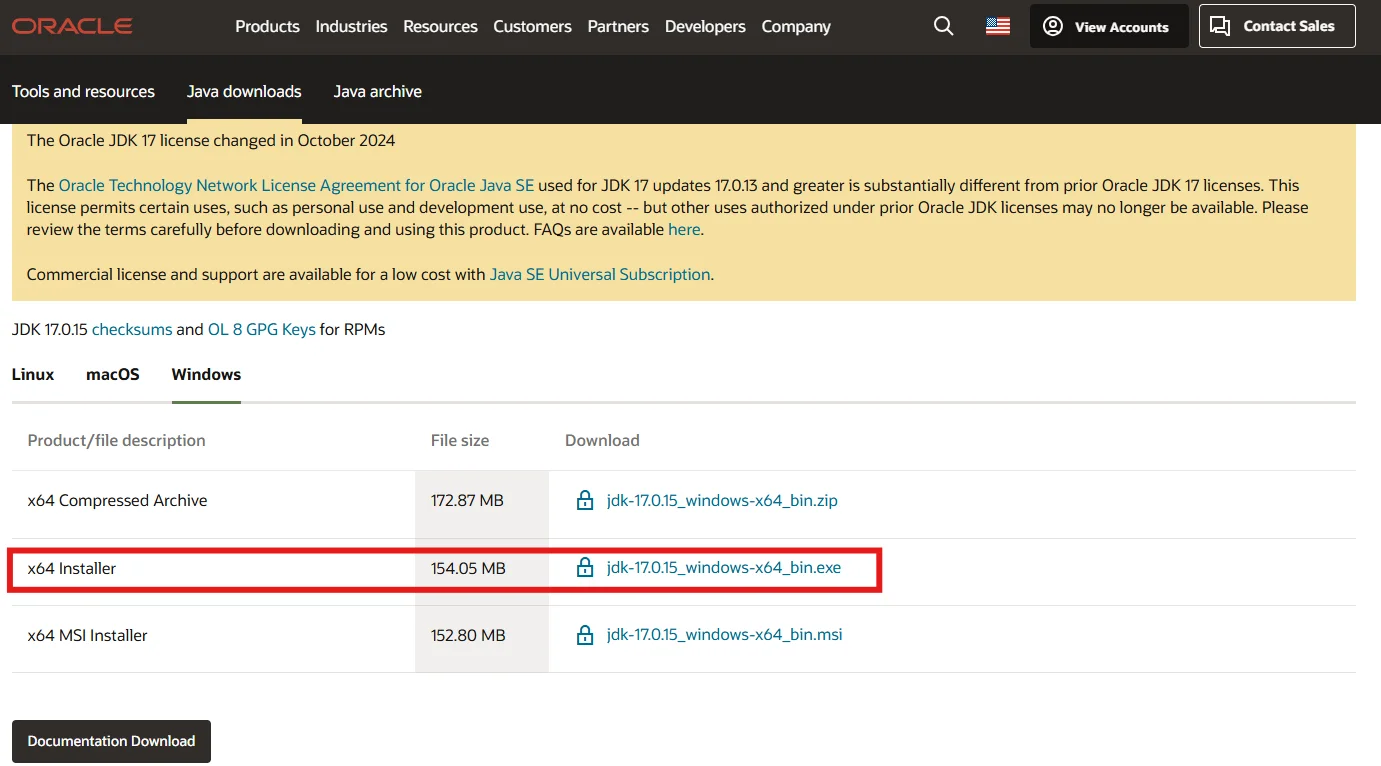
(Image is illustrative. Download from the Eclipse Temurin website for OpenJDK 25.)
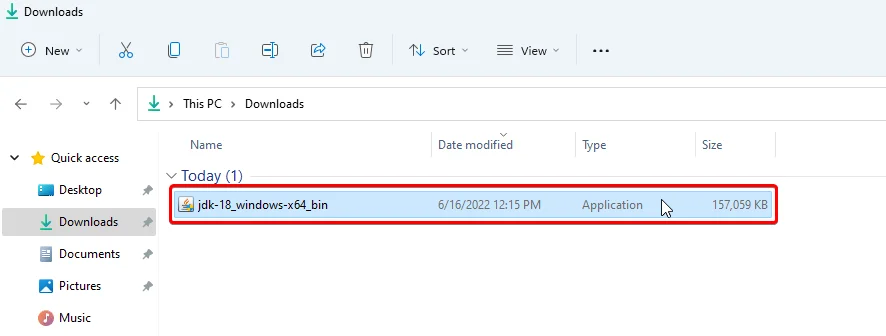
Navigate to the downloaded .msi file and run it. The most critical part of this step is ensuring the installer is configured to set the JAVA_HOME environment variable, which is essential for enterprise tools like Maven and Gradle.
Follow the installer prompts. When you reach the custom setup options, make sure to select the feature to "Set JAVA\_HOME environment variable" to ensure system compatibility with development tools.
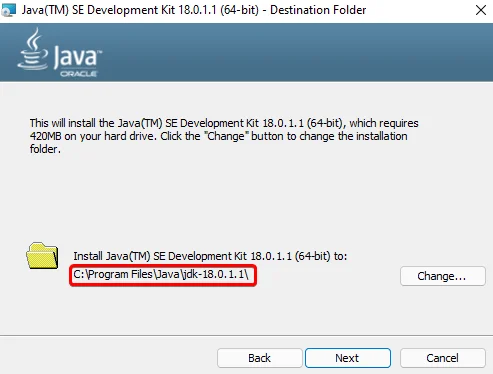
If the installer did not automatically set the variables, you must do so manually. Open the C drive, and navigate to the installation directory (e.g., C:\Program Files\Eclipse Adoptium\jdk-21). Copy this path.

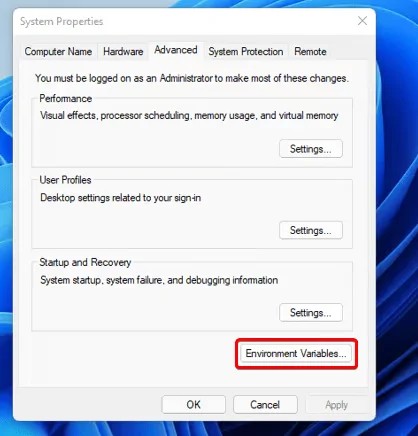
Search for "Environment Variables" in the Windows search bar and open the system properties. Click on the Environment Variables button.
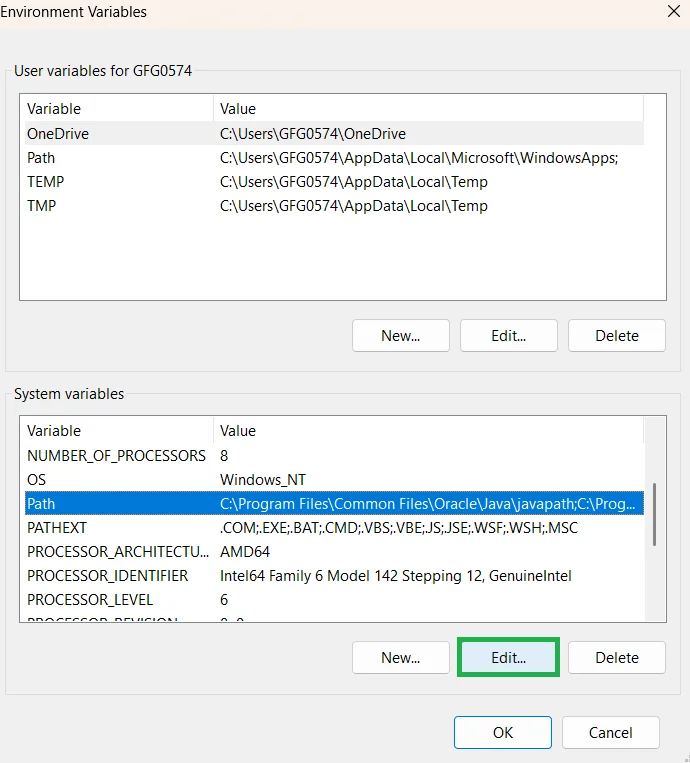
Under the "System variables" section, find the Path variable and click Edit.
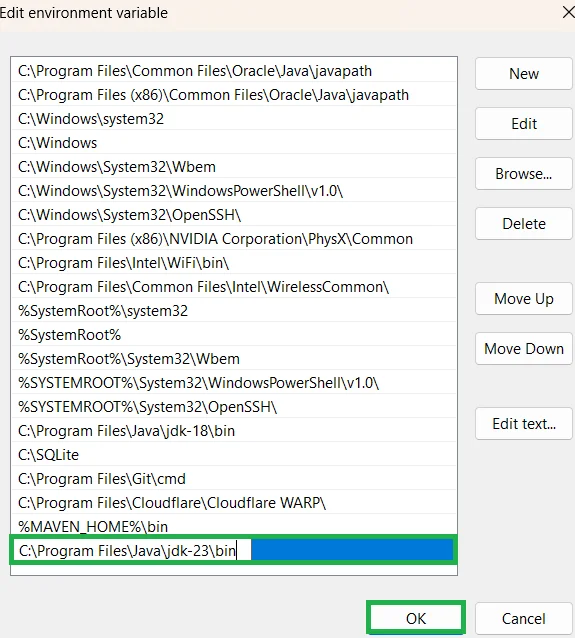
Click New and paste the bin path you copied (e.g., C:\Program Files\Eclipse Adoptium\jdk-21). Click OK on all windows.
Open a new Command Prompt or PowerShell window and run the following command to check if the JDK is correctly installed and accessible on your system Path. The output should confirm "openjdk 25".
java --version |
Related Article- 60+ Java Interview Questions and Answers (2026)
Setting the JAVA_HOME variable correctly is important for modern Java tools and frameworks such as Maven, Gradle, Spring Boot, IntelliJ IDEA, VS Code Java extensions, and containerized Java applications running through Docker.
For macOS, the recommended, quick setup is to use the popular package manager Homebrew. This approach is fast and automatically sets up necessary links, providing a low barrier to entry.
If you don't have Homebrew, run its installation script first. Then, install the OpenJDK 25 LTS version.
# Install Homebrew (if needed) /bin/bash -c "$(curl -fsSL https://raw.githubusercontent.com/Homebrew/install/HEAD/install.sh)" # Install OpenJDK 25 LTS brew install openjdk@21 |
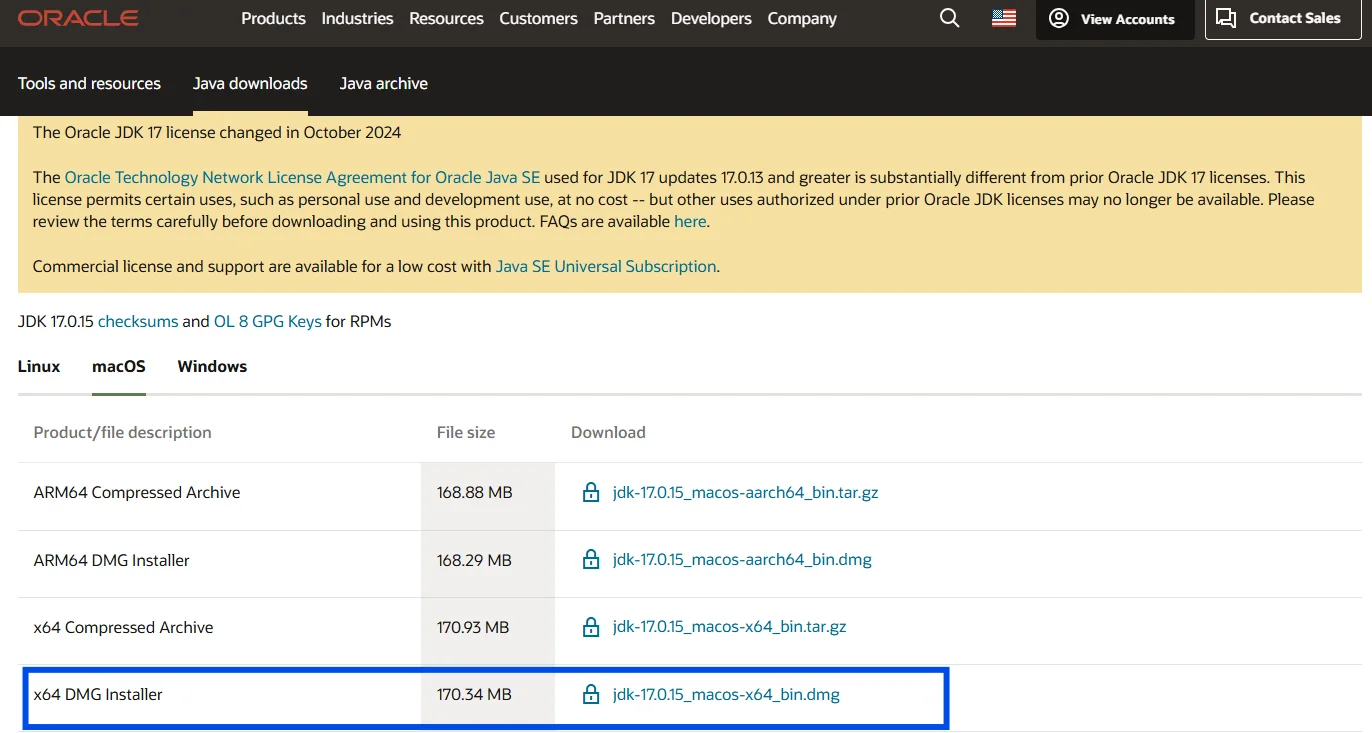
(Image is illustrative. Command line installation is the modern standard for macOS.)
Homebrew is widely used by Java developers working with Spring Boot, Docker, Kubernetes, and modern cloud-native Java applications because it simplifies package management and environment configuration.
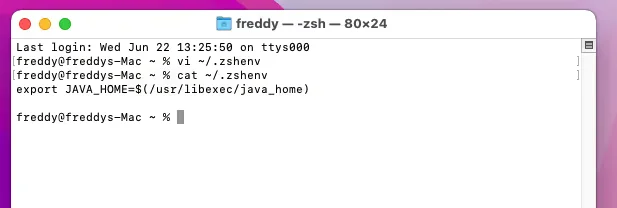
Set the JAVA\_HOME environment variable, which is crucial for tools, using the standard macOS utility java_home, and then source your profile (e.g., ~/.zshrc).
echo 'export JAVA_HOME="$(/usr/libexec/java_home -v 25)"' >> ~/.zshrc source ~/.zshrc |
Verify both the version and the path to ensure the installation was successful.
java --version echo $JAVA_HOME |
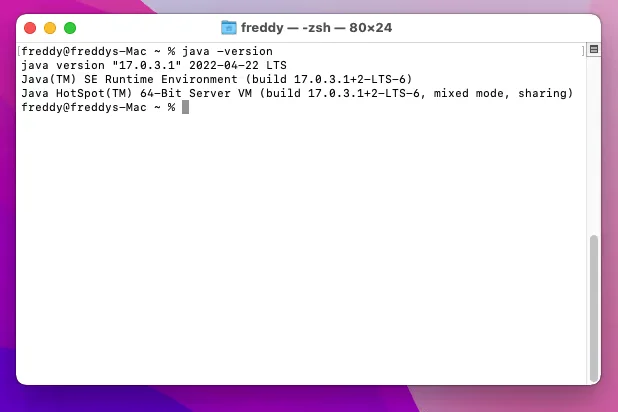
(The output should show a version string starting with "openjdk 25".)
Related Article- How to Learn Java from Scratch
For stability and low-barrier deployment in enterprise environments, installing OpenJDK directly from your distribution's official repository using APT is the standard, quickest, and most supported method. We will use Java 21 LTS, the current enterprise-standard long-term support release.
Ensure your package manager is up-to-date:
sudo apt update |
Install the specific OpenJDK 25 Development Kit package directly:
sudo apt install temurin-21-jdk |
(Note: If Java 25 is not yet in your distro's official repo, use the latest available LTS, e.g., openjdk-21-jdk, or follow the Temurin manual installation method.)
Setting `JAVA_HOME` is critical for tools like Tomcat, Maven, and Jenkins. First, find the installation path using the alternatives system:
# Find the base path, typically /usr/lib/jvm/java-25-openjdk-amd64 update-alternatives --config java |
Now, add the `JAVA_HOME` path to the global environment file (`/etc/environment`).
sudo nano /etc/environment |
Add the following line (adjusting the path if needed) and save the file:
JAVA_HOME="/usr/lib/jvm/java-21-openjdk-amd64" |
Apply the changes and test the variable:
source /etc/environment echo $JAVA_HOME |
Use the standard command to confirm if the OpenJDK 25 is correctly installed:
java --version |
The output should confirm the Java version is 25, ready for enterprise development.
Linux is the preferred operating system for many enterprise Java deployments, especially for Spring Boot microservices, Docker containers, Kubernetes workloads, and cloud-native Java applications running in production environments.
By following these steps, you have successfully installed the open-source, enterprise-grade Java 25 LTS OpenJDK. This robust foundation is essential for developing high-value applications, including microservices, big data processing tools, and enterprise applications, cloud-native services, backend APIs, and large-scale distributed systems. You are now ready to start your journey to write your first program or build a production-ready application.
Yes, absolutely. The recommended approach for both development and enterprise production is to use an OpenJDK distribution (like Eclipse Temurin or others), which is free, open-source, and fully compliant with the Java specification.
You can delete the JDK from your system just like any other program. On Windows, use the Control Panel's "Uninstall a Program" feature. On macOS, you can usually delete the JDK folder from /Library/Java/JavaVirtualMachines/. On Linux, use the package manager (e.g., sudo apt purge openjdk-25-jdk).
IDE stands for Integrated Development Environment. Popular Java IDEs include IntelliJ IDEA, Eclipse, and Visual Studio Code with Java extensions. These tools help developers build Spring Boot applications, manage Maven or Gradle projects, debug code, and develop enterprise-grade Java applications more efficiently.
Yes, multiple versions can be installed but environment variables must be configured correctly.
Modern Java development commonly includes frameworks and tools such as Spring Boot, Maven, Gradle, Docker, Kubernetes, IntelliJ IDEA, VS Code, and cloud platforms for building scalable microservices and cloud-native Java applications.