MongoDB is among the most popular NoSQL database management systems. Its use is global for storing large amounts of data and creating web applications. Many individuals and companies often struggle to install this DBMS (Database Management System) into their Windows system. This blog post on how to install MongoDB on Windows is a stop solution for them.
It includes different methods to install this system on Windows. This installation process involves many steps, including downloading, setting up, checking and updating the executable file. We will discuss all these steps in detail throughout this article. This knowledge has become very important these days. In fact, across 4856 big companies, including LaunchDarkly, Uber, and Delivery Hero are using this system.
Individuals must have to consider all the system requirements before installing this DBMS to their machine. There are many versions of this system available on the internet. Each of them has its own compatibility for different Windows updates. Here are some of the most popular ones-
There is one more thing to consider. The user should run mongod and mongos with the necessary permissions from these groups-
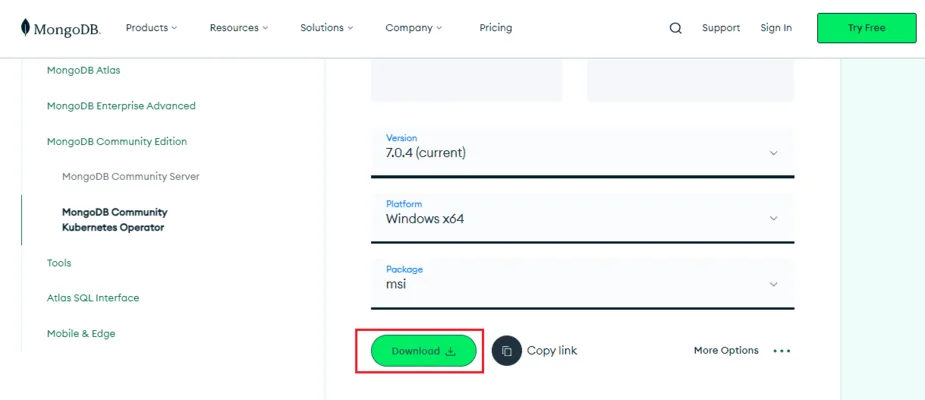
It is important to understand how to download MongoDB in Windows before proceeding to its installation. Downloading this system is not a hard part. Anyone can find this file on the MongoDB Download Center. They just have to select the version that is most compatible with their system specifications. Version - 7.0.4, OS - Windows x64, and Package: msi are the most popular ones.
Now, let's discuss how to install MongoDB in Windows. Anyone can install it once they have a MongoDB server with a straightforward process. Listed below are the steps and required resources to install this DBMS on Windows -
Step 1. Navigate and open the MSI file from your file manager, which you have already downloaded. This will show a window with a Next button. Click on this button.

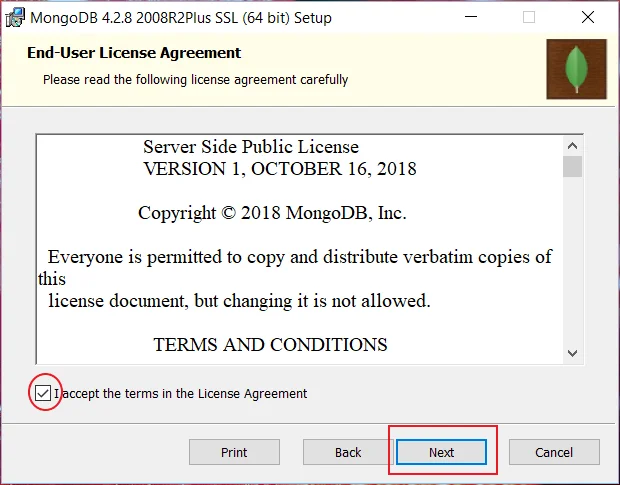
Step 2. Now, an End-User License Agreement will be open on your screen as given below. Check all the terms and conditions and continue with agreeing to them. Click on the next button.
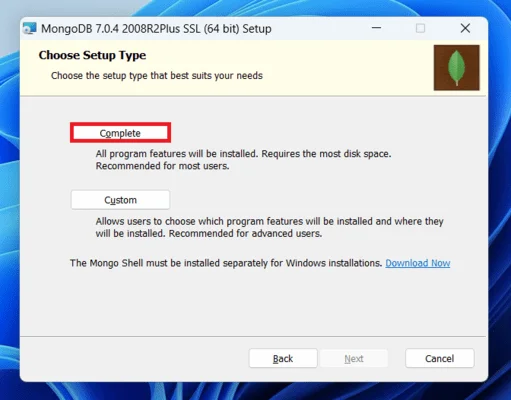
Step 3. A new interface will open on your screen showing a Complete and a Custom button. Continue by clicking on the Complete button. This will install all the features to your system. The Custom option is for installing particular features only.
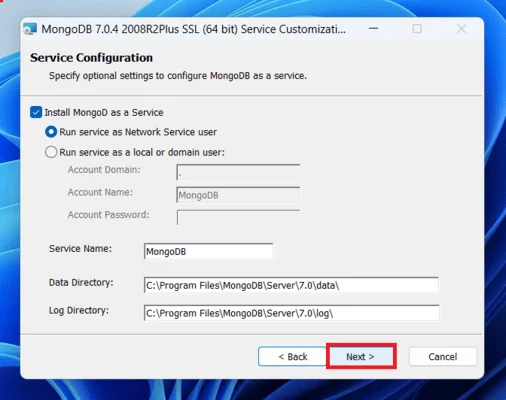
Step 4. This will open a new window with two options - Run service as Network Service user and Run services as local domain user. Select one to decide the service. Then copy the path from the data directory and click on next.
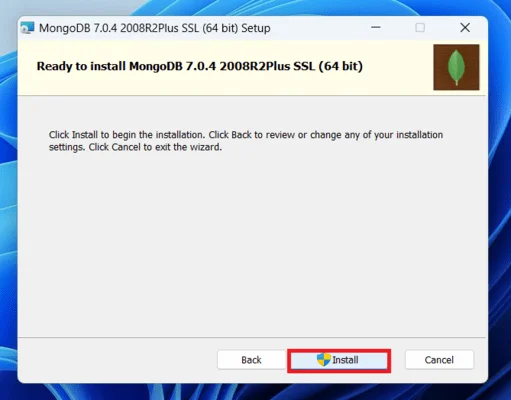
Step 5. Now an installation window will be open as shown below. Click on the install button. This will start the installation process.
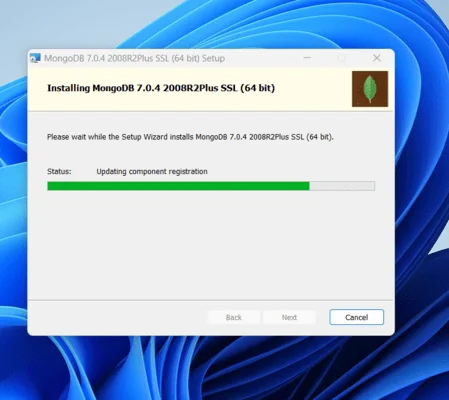
Step 6. Wait for a few minutes until the installation process is complete and click on the finish button.
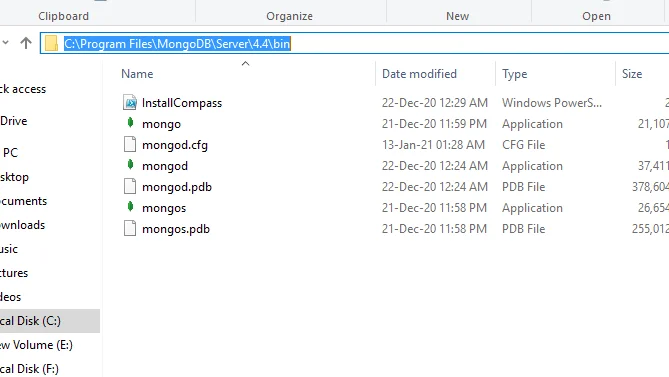
Step 7. Now go to the location which you have copied from the data dictionary and copy the bin path.
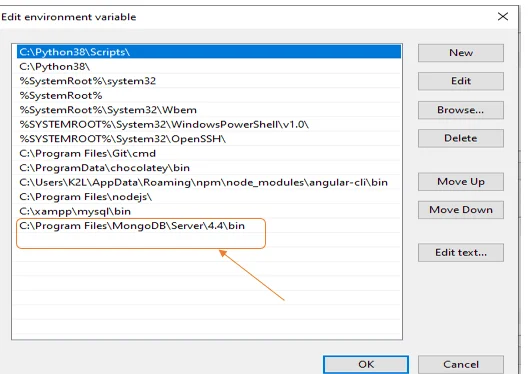
Step 8. Build an environment variable, open System Properties> Environment Variables> System Variable > Path > Edit Environment variable in the same sequence. Then paste the copied link to the interface and click on the Ok button.
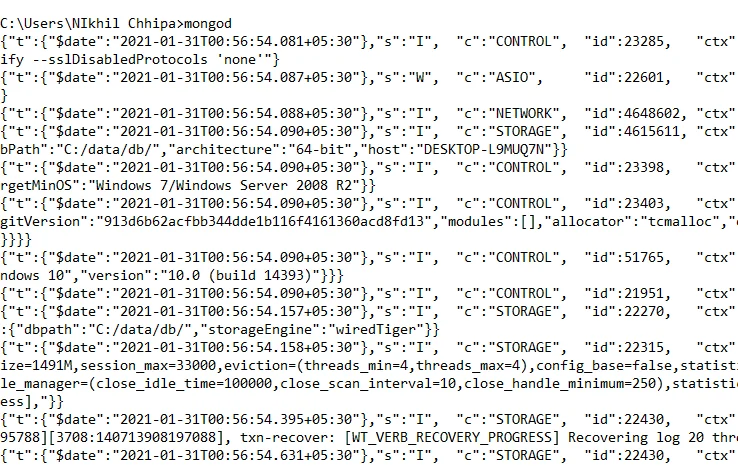
Step 9. It is now time to run a MongoDB server like mongod. It is run by a command, namely mongod, in the Command Prompt. This command might show an error as -
| C:/data/db/ not found |
Step 10. Open C drive from your device and create a new folder named data. Create one more folder inside this folder and name it as db. Run the same command after creating these folders. Now it will definitely run successfully.
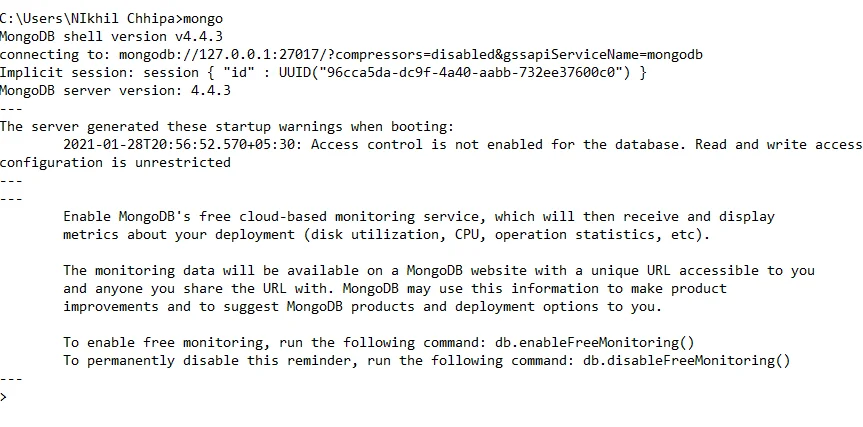
Step 11. Now connect your server (mongod) and the mongo shell. You have to keep the mongod window and give a command mongo in the Command Prompt. This will successfully build a connection between the server and the mongo shell.
Related Article - A Beginner's Guide to Learn MongoDB
Do you know how to set up MongoDB in Windows? This knowledge is also important to make good use of this DBMS as you have to set up MongoDB on your system. It is important to build a new database, documents and collection in your shell. Below is an instance on how to set up and build a new database-
use gfg |
db.company.insertOne({igmGuru:500000}) run-mongodb |
Now MongoDB is successfully installed and set up to use.
Related Article - MongoDB vs MySQL - A Complete Comparative Guide
This DBMS is in a continuous development phase and there are many updates released frequently. This is why one must know how to check the MongoDB version in Windows to remain updated with the latest trends. This lets them know if they are using an old version on this system so they can update it. It can be determined with the following four methods -
The MongoDB shell has a built-in command to check the server version. The given below are steps to use it -
1. Open the Command Prompt from the Start menu.
2. Start the MongoDB server with the mongod command.
3. Open the MongoDB shell by using the mongo command.
4. Now input the db.version() command to detect the version as follows -
INPUT -
$ mongo > db.version() |
OUTPUT -
4.4.12 |
The version can also be detected with the mongod --version command. You just have to put this command in the Command Prompt as follows -
INPUT -
$ mongod --version |
OUTPUT -
db version v4.4.12 Build Info: { "version": "4.4.12", "gitVersion": "4d5ff2e198b903753ebad165ab6baf46154dfebe", "modules": [], "allocator": "tcmalloc", "environment": { "distmod": "ubuntu2004", "distarch": "x86_64", "target_arch": "x86_64" } } |
Explore this MongoDB Tutorial to understand this database better.
If the server has been installed with a package manager then it can be determined with query information. Let's assume we have used the APT package manager. Here is how it will be done -
1. Input a valid command in the command prompt as given below -
apt show mongodb-org |
2. This will show an output with the version installed in the system -
Package: mongodb-org Version: 4.4.12 |
We can also see the file version by navigating the installation directory and looking for a file named as VERSION or similar. Here is an example -
INPUT -
$ cat /usr/local/mongodb/VERSION |
OUTPUT -
4.4.12 |
Also Explore: How to Get MongoDB Certification?
This guide on how to install MongoDB on Windows has outlined all the steps related to this process. It has also included how to download, setup and check the version of this system. This information is enough to get started with this DBMS. You can further use different types of resources like MongoDB tutorials to know more about it.
Installing this DBMS is not a hard process. Anyone with enough sources and a structured approach can install it. They have to download the executable file, set up this file and choose the perfect settings. We have already discussed the whole process in this article.
It has different product offerings. One is MongoDB Community Server that is open source and free to use. Second is MongoDB Enterprise Advanced Server that is a paid and self service system. Another is MongoDB Atlas that is paid and fully managed by Azure, AWS and Google Cloud.
It is indeed easy to learn due to it uses JSON documents for data storage. This document data model type maps naturally for objects within an application code. This data model is understandable by anyone with or without a cloud related background.