MySQL is one of the most popular relational database tools with a market share of over 40%. This number looks very good when comparing with its top competitors such as PostgreSQL (16%) and Oracle Database (11%). Using MySQL in Docker can significantly streamline development and deployment processes for modern applications by offering a robust containerization solution for efficient database management. This approach is crucial for building scalable and easily reproducible development environments. But how?
In this article, we will discuss how to set up and configure MySQL in Docker. It includes everything from the requirements, downloading process to setting up and configuring MySQL. It will explain how to connect to MySQL servers, host MySQL clients, connect with containers (containerization) and many more. Let's begin.
The first thing one must know is the prerequisites to set up and configure MySQL in Docker. There are many of them. One should follow each of them to set up and configure it efficiently. Let's explore these -
1. Command line or terminal access - It needs a local environment of terminal access. Jupyter environments like Colab are not suitable for direct Docker command execution. Ensure you have a local terminal available.
2. A running Docker instance - A Docker Desktop is must before starting this process. You can check it by the command $ docker --help or see the bottom left of your interface for the image given below.

3. Basic familiarity with Docker - A basic familiarity on Docker will be very beneficial in this process. It is also important to understand docker commands for MySQL management. This article explain them all.
4. Basic knowledge in SQL - A basic knowledge in SQL is also a must in this process as we can not explain all the commands in this blog. It will deviate us from the main point of discussion.
Let's now explore the step-by-step guide to deploying MySQL with Docker.
Enroll in igmGuru's Docker training program to learn with industry experts.
Setting up MySQL in Docker is a multistep process that includes downloading, running and managing the MySQL Docker image. Then we have to connect it to the server. Here are the steps you should follow in this set up process -
These images are basically blueprints of containers. These contain all the instructions and components to run an application or service. Navigate and open the command prompt in your system and use the command $ docker pull mysql:latest. Here docker pull should have the name and version of suitable image in an image:version syntax.
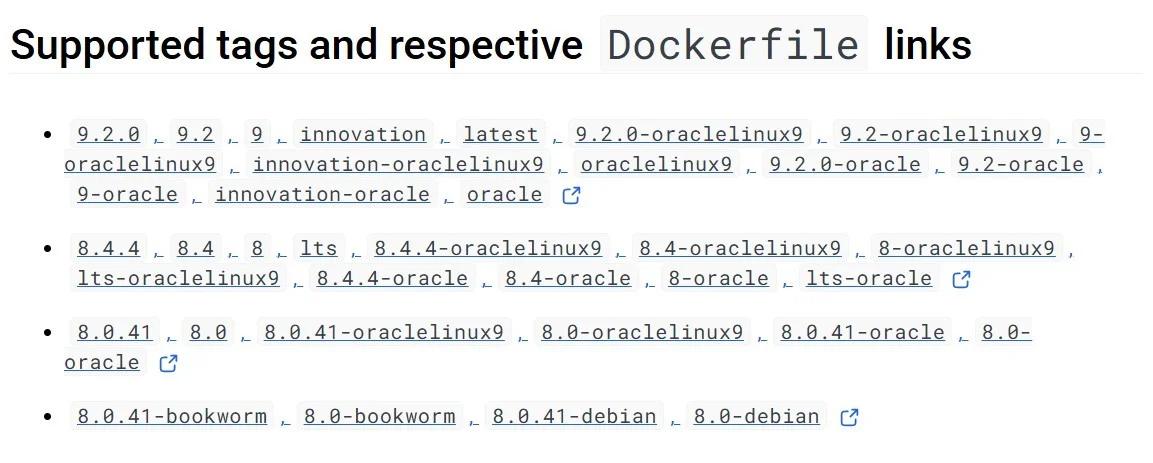
The keyword latest is used to download the most recent version. Visit the official image website if you are not sure about the suitable version. Here many versions for different purposes are listed as shown above. Let's take an instance of installing the version v8.2 -
| $ docker pull mysql:8.2 |
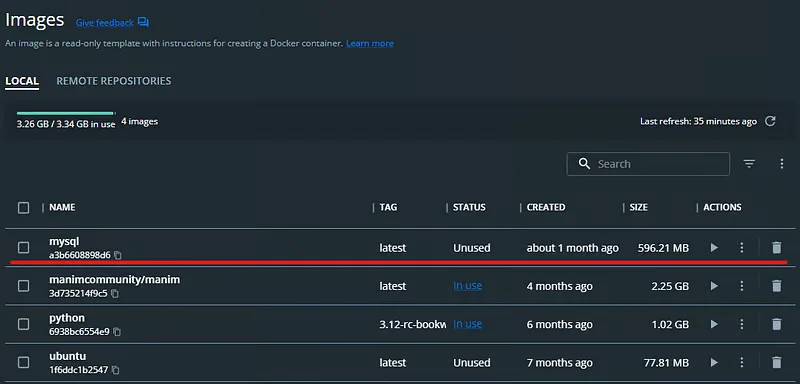
| $ docker images |

You may have the knowledge to create a container from the MySQL image. It will require performing different operations on this tool. Use the command $ docker run --name test-mysql -e MYSQL_ROOT_PASSWORD=strong_password -d mysql in this instance. In this command -
This command will build a new or start the existing container. This will return a long string of gibberish. Now you can check its status with the following command.
| $ docker ps |

A Docker container works as an emulator for operating systems. It can execute any task that requires a terminal from within the container. The terminal is accessed with the following command to launch a bash session.
| $ docker exec -it container_name bash |
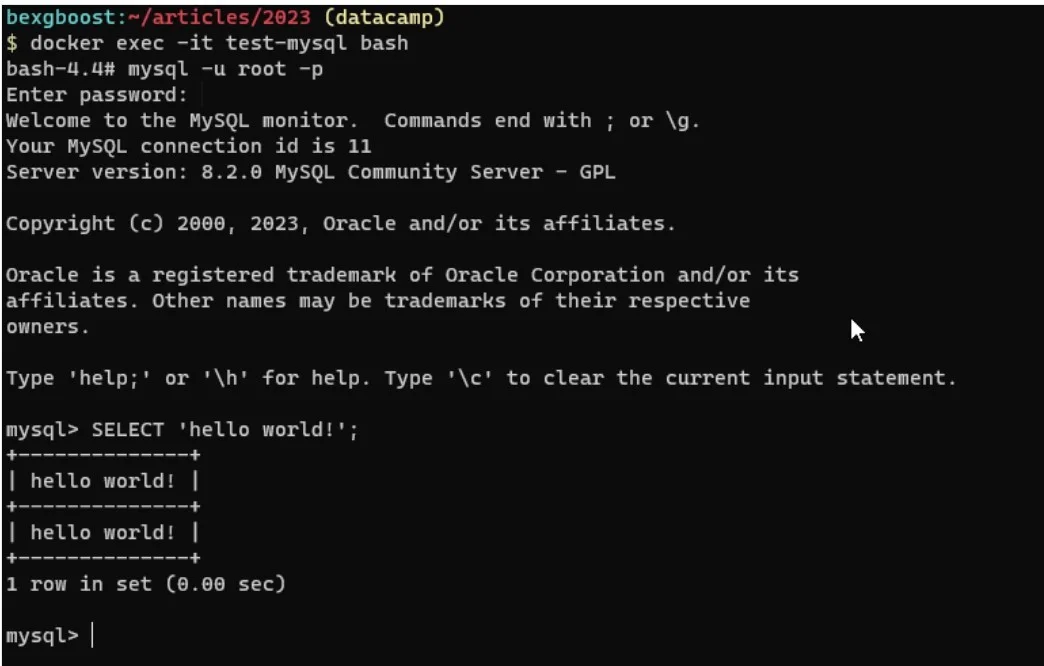
Now use these containers to launch a MySQL server. It is a must to perform everything from creating to managing databases. These containers have a MySQL client that runs SQL queries. It is basically a MySQL terminal command. Follow the steps listed below to make a connection with the server -
| $ docker exec -it test-mysql bash |
$ mysql -u root -p Enter password: ... mysql> |
Related Article- How to Create a Dockerfile- A Beginners Guide
There are many options available to configure for MySQL in Docker. We have just explored some of them. These containers use configuration files in this instance. This file is usually stored inside a directory of the container. These directories are /etc/mysql/, /etc/mysql/conf.d and /etc/mysql/mysql.conf.d.
1. These directories change with every image. But the name and extension for a standard file will always be my.cnf. This file must exist in a directory or the container will require an additional configuration file. Let's assume this case for our test-mysql container -
Start from stopping and removing the container with the following command - docker stop test-mysql && docker rm test-mysql |
2. Now build an empty configuration file on your system -
sudo mkdir -p /path/to/your/mysql/config # Choose a suitable local path sudo nano /path/to/your/mysql/config/my.cnf # Or use any text editor |
3. Link the two empty .cnf files to restart the container -
$ docker run \ --name test-mysql \ -v /etc/docker/test-mysql:/etc/mysql/conf.d \ -e MYSQL_ROOT_PASSWORD=strong_password \ -d mysql |
Related Article- Docker Tutorial For Beginners
The default configuration of MySQL Docker containers will not be flexible enough to perform each task. It is limited to some of the common ones. This is why we have to modify some settings or configure MySQL performance in Docker. This practice not only optimizes performance but also security and resource usage. Here are some of the most common changes and modifications you can do -
Data persistence is the ability to ensure that the data stored within a MySQL database running inside a Docker container remains invincible of any container instances. This means it will remain the same even after the container is stopped, removed or recreated.
It is an important mechanism as any data written to the container's ephemeral filesystem would be lost without using it. Some of the common benefits of Data Persistence in MySQL Docker Containers are:
Docker supports two main ways to persist data including:
Here are some of the best practices that should be considered while working on MySQL Data Persistence.
The easiest and reliable way to persist data on MySQL Docker containers is by mounting a Docker volume to the directory. Here, MySQL stores its data (/var/lib/mysql) into the mounted Docker volume. Here’s how you can do it:
Create a Docker volume that will provide managed storage, decoupled from the container lifecycle.
| $ docker volume create mysql-data |
Attach the volume to the MySQL data directory when starting your container:
| $ docker run --name my-mysql \ -e MYSQL_ROOT_PASSWORD=your_password \ -v mysql-data:/var/lib/mysql \ -d mysql:latest |
Now, any databases or tables you create will be stored in the mysql-data volume. This value will not change in any instance, including removing or recreating the container.
It requires you to use the mysqldump utility from inside the container or copy files directly from the volume. Here is an example of how you do it:
| $ docker exec my-mysql mysqldump -u root -p your_database > backup.sql |
| $ docker exec -i my-mysql mysql -u root -p your_database < backup.sql |
You can use docker cp to copy files between your host and the container or volume if needed.
You have now explored the essential steps, from pulling the official image to fine-tuning configurations for optimal performance and security. This practical knowledge provides a solid foundation for your future in database management and containerized applications.
The ability to orchestrate MySQL in Docker is a valuable skill in today's tech-driven world, opening doors to many new opportunities. Continue learning to strengthen your knowledge and skills and build a successful career in this dynamic field.
Anyone can use MySQL in Docker. Docker Hub has official MySQL images for this purpose. One can use any of these to run different MySQL cases in containers. They just have to download, set up and configure it for their use case.
It is a straightforward method. You can use the $ docker exec -it test-mysql mysqladmin -u root -p ping command. This command needs to be repeated until MySQL is actually ready. You can also use a loop to mitigate the repetition of the ping command. This will run until a successful response comes.
InnoDB is a basic storage engine of MySQL. It balances the reliability and performance of the containers. It comes as a default storage engine in MySQL 8.0.
Course Schedule
| Course Name | Batch Type | Details |
| MySQL Course | Every Weekday | View Details |
| MySQL Course | Every Weekend | View Details |