Jira software is reputed as an undisputed leader among agile project management tools. It has a market share of 84.57% as a bug tracing software. This is why it has become important to understand how to create a board in Jira these days. This skill can benefit individuals to land a great job as a Jira expert.
This is one of the most demanding jobs out there. Many big companies like Spotify and Airbnb are offering impressive salaries to these experts. This blog post includes everything one must need to know for using this software to its full potential. It explains what is board in Jira, its elements and steps to create them.
Board in Jira is a tool that displays bugs and issues within one or more projects. This gives a flexible technique to view, manage and report on work in progress. A board in Jira is typically of two types, including Scrum and Kanban boards. The Scrum board is for planning operations in sprints for teams.
Kanban board focuses on handling and constraining its running operations. This software gives the ability to create a personal Jira board or use someone else's. There are no limitations on the creation of these boards. One can build as many as they require or use a combination of them. Experts usually prefer to use the Kanban boards.
Enrol in igmGuru's Agile and Scrum Certification Courses program to start your career in project management.
Let's understand this abstract concept in detail and explore the fundamental elements of a Kanban board. Each of its elements is responsible for different features. Understanding them in detail will inform you of their importance and applications. The following are the elements of a board in Jira -
The operations, bugs, and process units are tagged with cards in Kanban boards. The cards contain the information about the entire process. One must make sure that this information is reliable. This information includes task name, description, status, deadlines and more. It is also important to assign a separate card for every task to achieve optimal transparency.
Columns are responsible for arranging the workflow in different phases that are vertically visual. The total number of columns indicates the complete workflow. The cards assigned to the operation move from column to column throughout the entire process. The task is considered as done when the card reaches the last column. It is also possible to configure columns according to specific requirements.
Work-in-progress limits decide the maximum number of cards or tasks to be dragged in columns. This means the column will only pick three cards if we apply a WIP limit of 3. This practice results in many features. It saves time for teams, gives them better transparency into the process and increases their productivity. It also finds out bottlenecks on the fly.
Swimlanes are just the opposite of workflows. It represents a list of issues in a horizontal view. This element also has some additional features. It can categorize operations on the basis of different criteria, including teams, departments and processes. It can also prioritize the tasks by importance and urgency at a glance.
Commitment Point is the endpoint of a task. It is committed by teams when they successfully complete the task. A card is extracted from the backlog series into the first column after reaching this point.
Delivery Point is the endpoint of each workflow or project. It occurs when projects are finally sent to the end customer. Teams always focus on reaching this point as soon as possible without sacrificing quality.
Explore the Similarities, Differences and Integration of Jira and Confluence.
The backlog is basically a concept in Jira and Kanban boards. It cannot be considered as an element but is still equally important. The backlog contains all tasks that are yet to be implemented or started. It can be considered as a room of tasks where teams can find tasks for the future. Teams update it on a regular basis.
The main question here is how to create a Board in Jira. Creating a Jira dashboard is a prerequisite to building a project first. Then, we can build a dashboard for the project. Let's start with creating a new project -
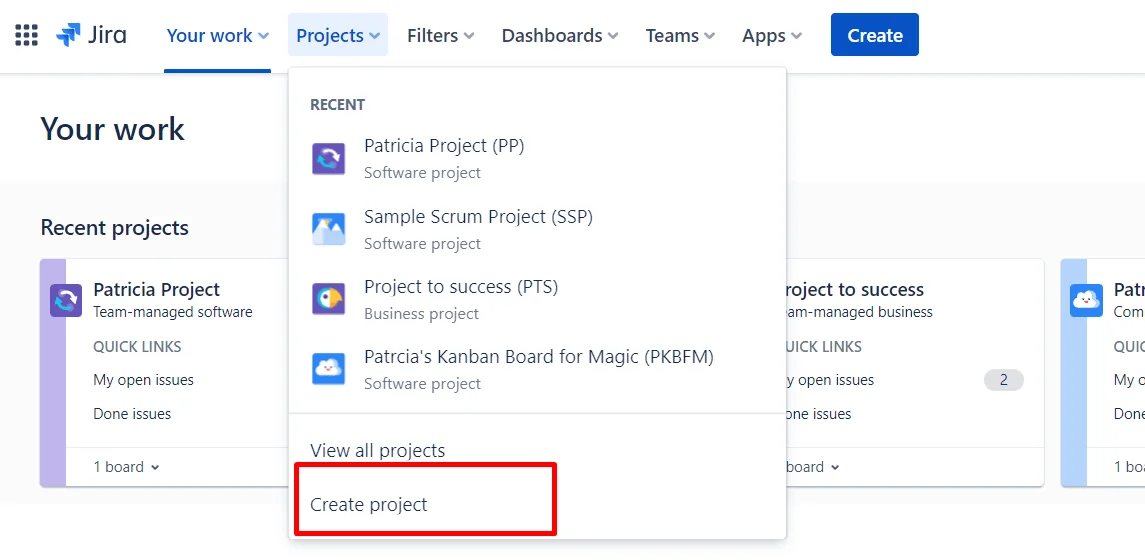
Step 1. Open the Jira software on the system and find the menu named Projects. It will be at the upper left corner of the screen as shown below. There are many options under this section. Choose the Create Project.
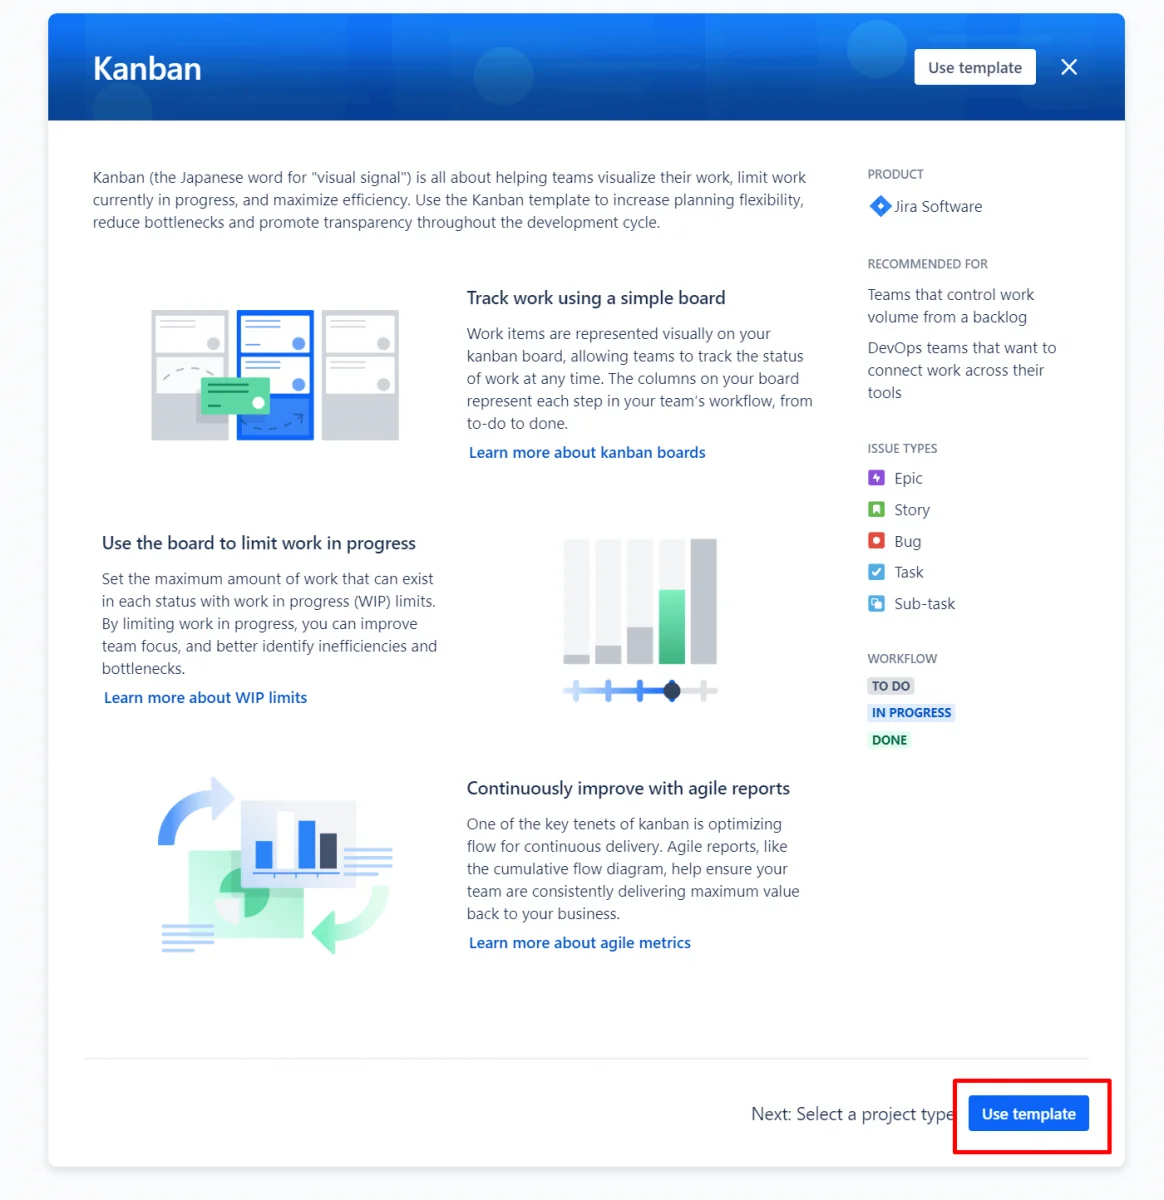
Step 2. This will open a new screen where you may find many templates under software development. We will choose Kanban for this instance. You can choose any of them.

Step 3. Here you will see a small overview of the template. This includes the information of the template about its features and applications. Just click on the Use Template button.
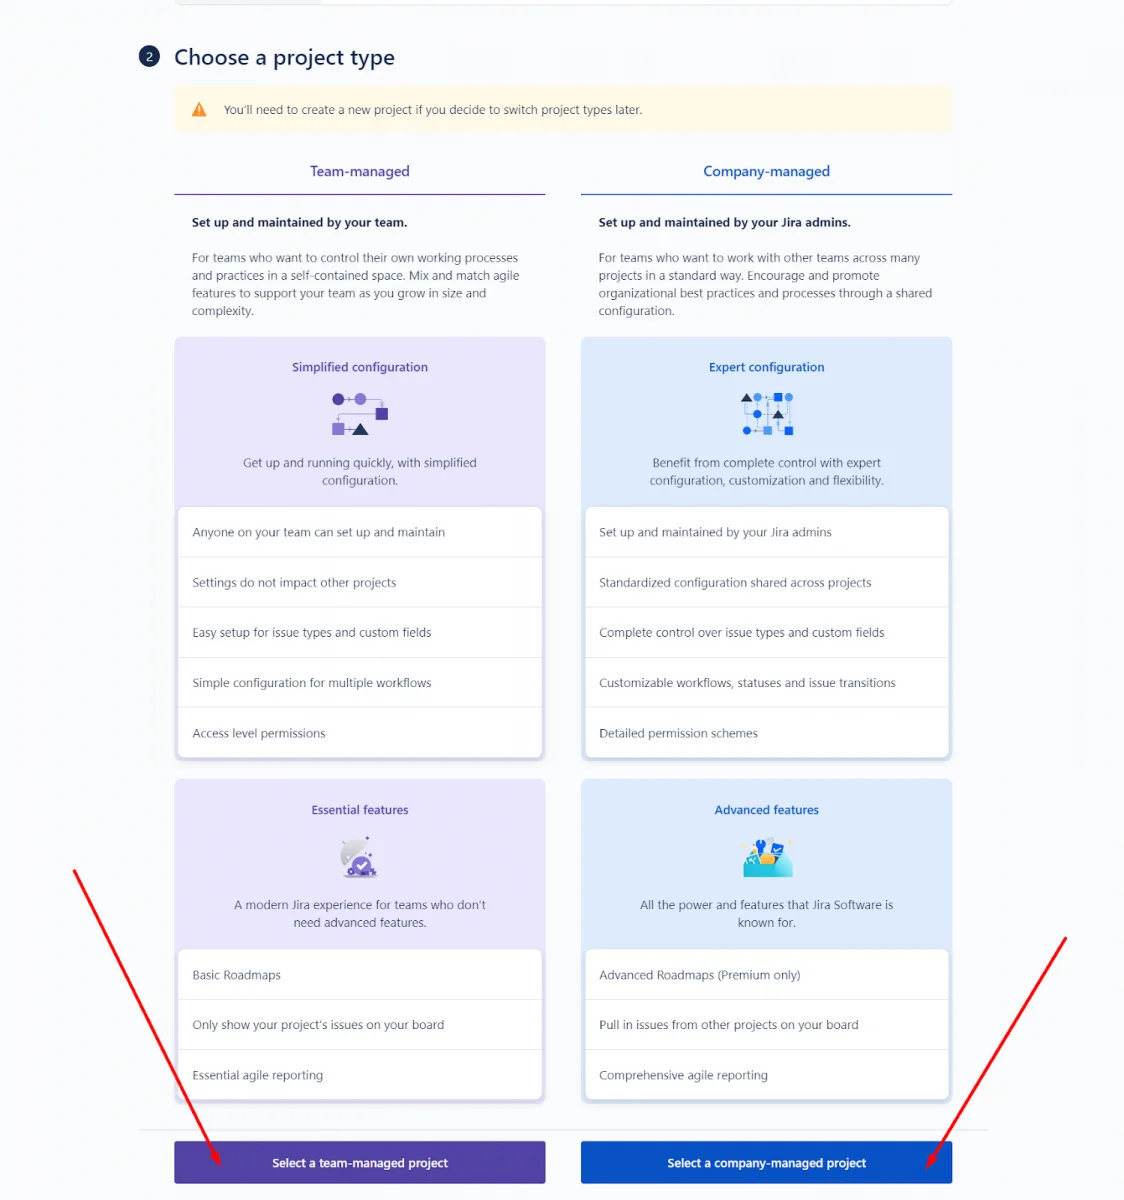
Step 4. Now two options as team managed and company managed will be shown on the screen. Select the project you want to build.
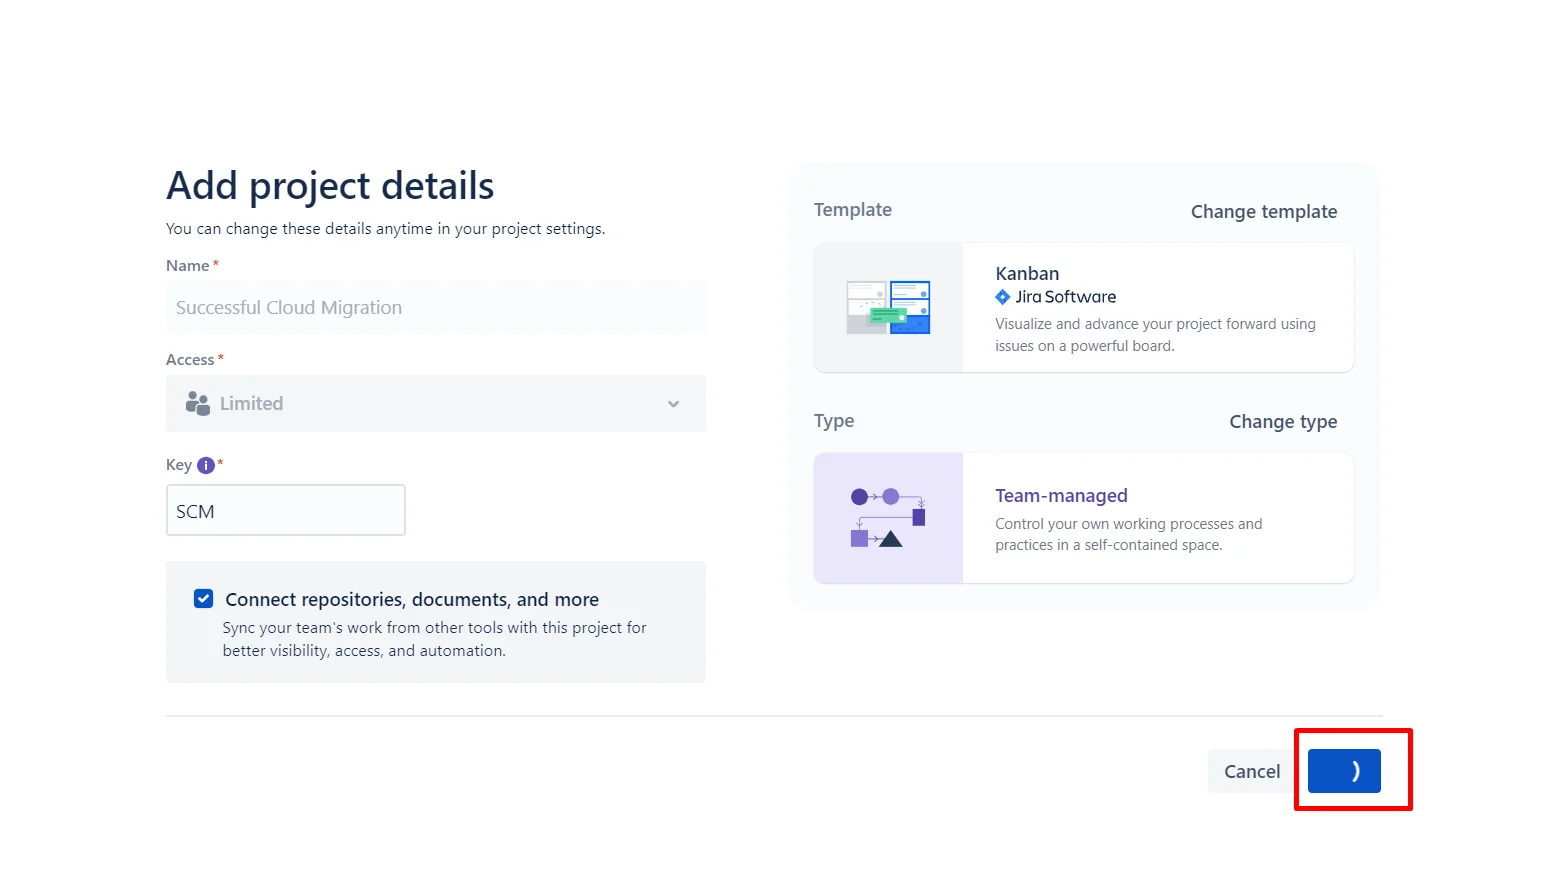
Step 5. Now it will ask you to enter the project details like name, key and so on. Fill these details carefully as it is important for transparency. Continue with deciding the access and keep clicking on next.
Related Article - Jira Bug Tracking Tutorial
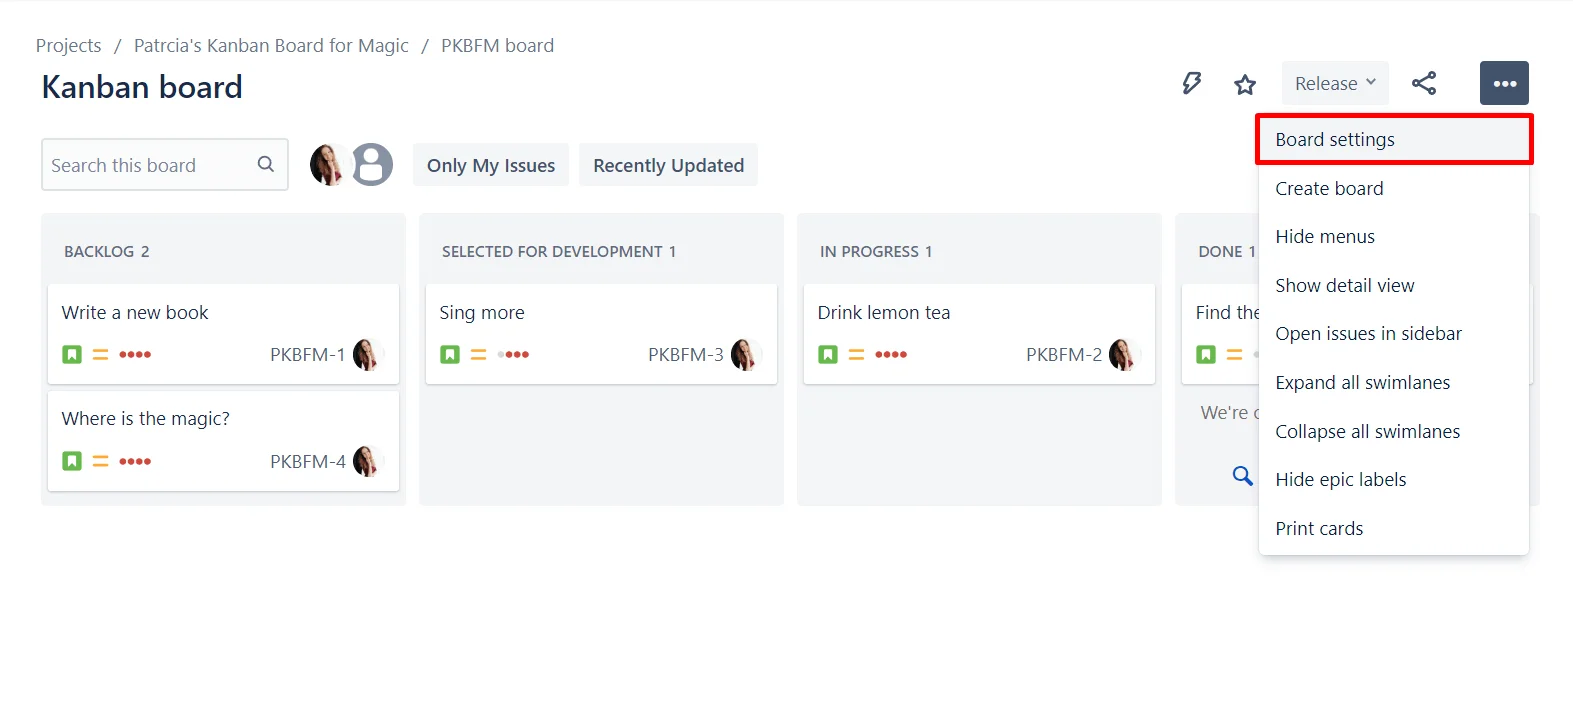
Only project and board administrators have the authority to configure these boards. It is configured from the settings menu. Open the settings in the board as given below -
Related Article - Jira Interview Questions
We have discussed all the steps of creating a Kanban board in Jira with ease. It also has another type of board, namely Scrum. Do you know which is better between Kanban vs. Scrum boards in Jira?
The choice of the better one completely depends on the use case and requirements as both of them are agile methods. Both of them can optimize the productivity and efficiency of project management. The table listed below includes some of the common differences -
| BASIS | KANBAN | SCRUM |
Focus | Continuous flow & improvement. | Iterative progress with fixed-length sprints. |
Roles | No predefined roles available. | Defined roles available for Scrum Master, Product Owner and Development Team. |
Work Process | Work items flow through various stages in a visual board. | Work is planned in time-boxed sprints (usually 2 weeks). |
Workflow | Continuous without any fixed timeframes. | Iterative cycles (sprints) with set deadlines. |
Change Management | Changes can be made anytime. | Changes are discouraged during a sprint. |
Task Limits | WIP limits are set to optimize flow. | Work is planned per sprint, which limits changes until the next iteration. |
Deliverables | Continuous delivery releases happen when work is done. | Deliverables at the end of each sprint. |
Explore our complete Jira Tutorial For Beginners
Anyone can build a project or board in Jira by following the steps listed in this article. There are many benefits of working on this software. It gives a great view of the different aspects of the project. It is also possible to configure these boards to cater to different requirements. This dashboard is capable of operating and optimizing the performance of teams.
Anyone can create a personal board in Jira. This software gives the ability to build projects and dashboards catering to specific requirements. You can also configure them to add new functionality for better performance.
This software gives free plans with 2 GB of cloud space and community support for 10 years. It has a free trial of Jira Cloud Standard and Premium on the Try Cloud page. You will have to purchase premium plans in order to use it at its full capacity. You can see and purchase these plans from its official website.
This software is indeed one of the best, but it has some limitations too. It does not have a great support system and is less versatile compared to its competitors. These limitations are mitigated by implementing some configuration and customization. It is a complicated process.
Course Schedule
| Course Name | Batch Type | Details |
| Jira Training | Every Weekday | View Details |
| Jira Training | Every Weekend | View Details |