Power BI is a powerful business analytics tool by Microsoft that helps you visualize your data and share insights across your organization. It's one of the most popular tools for data analysis and reporting. If you're just starting your journey with Power BI, the first step is installing Power BI Desktop on your system.
This article will walk you through everything you need to know about installing Power BI Desktop - from system requirements to step-by-step instructions - written in simple, easy-to-understand language.
System Requirements
Prior to downloading Power BI Desktop, one must make sure that the system meets the following requirements:
- Operating System: Windows 7/ 8/ 8.1/ 10/ Server 2008 R2/ Server 2012/ later versions.
- Memory: Minimum 1 GB RAM/ 2 GB (or more) recommended.
- Disk Space: At least 1.5 GB available
- .NET Framework: .NET 4.5 (or later)
- CPU: 1 GHz 64-bit processor or better.
- Display: Minimum requirement of 1440x900 to 1600x900 resolution.
Explore igmGuru's Power BI Certification Course to become a Power BI Developer.
How to Download and Install Power BI Desktop
Step 1: Download Power BI Desktop
These steps should be followed to download Power BI Desktop-
- Access the Download Section: Navigate to the Power BI homepage > hover on the 'Products' menu, which is at the top of the page > click on 'Power BI Desktop' in the dropdown list. This will lead to the 'Power BI Desktop' page.
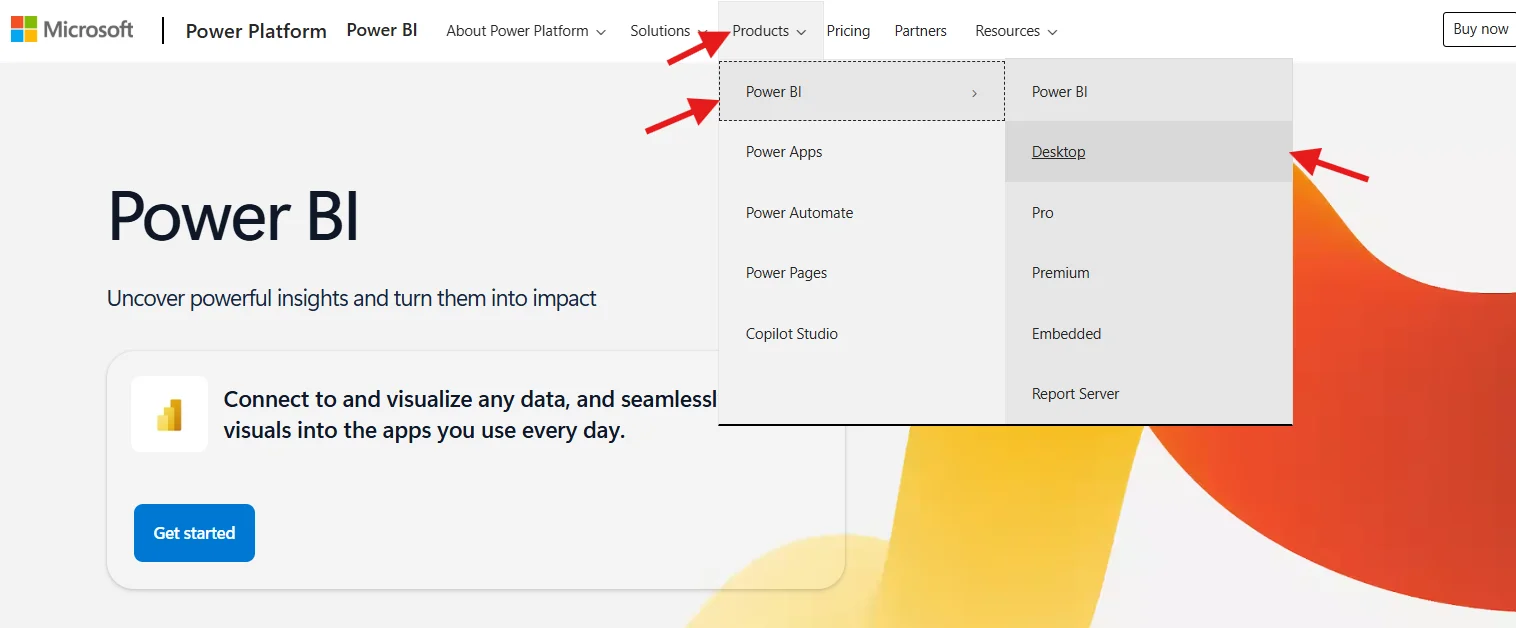
- Initiate the Download: A button named 'Download free' will appear. Click on this button. It will redirect the user to the 'Microsoft Store' page or to a direct download page. It varies as per the system and browser settings.

Pick the Download Method:
- Microsoft Store: Click on 'Get' > follow the on-screen instructions.

- Direct Download: Pick the apt version (32-bit/ 64-bit) as per the system architecture > click on the download link.
Step 2: Installing Power BI Desktop
After the Power BI download is finished, it's time to install Power BI Desktop. Here are simple steps to make it happen.
- Locate the Installer: Navigate to where the downloaded file has been saved. It is generally named something like 'PBIDesktopSetup.exe.'
- Run the Installer: To run the installer file, double-click on it. A User Account Control (UAC) prompt may appear, seeking permission to render changes to the device. Click 'Yes' to move ahead.
- Pick the Installation Language: Once the installer is launched, a prompt to pick the installation language will appear. Pick the appropriate language and click 'Next'.
- Say yes to the License Agreement: Go through the license agreement > select the checkbox stating 'I accept the terms in the License Agreement' > click 'Next'.
- Pick the Installation Folder: The installer prompts the user to pick the destination folder to install the Power BI Desktop. The default location is also fine. However, it can be changed if needed. Click 'Next' to continue.
- Commence the Installation: Tap on the 'Install' button to commence the installation process. The necessary files will be copied to the system and the app will be configured by the installer. This process may take some time.
- Finish the Installation: After completing the installation, a final screen pops up to confirm the complete installation of Power BI Desktop. Tap on 'Finish' to exit the installer.
Step 3: Launching Power BI Desktop
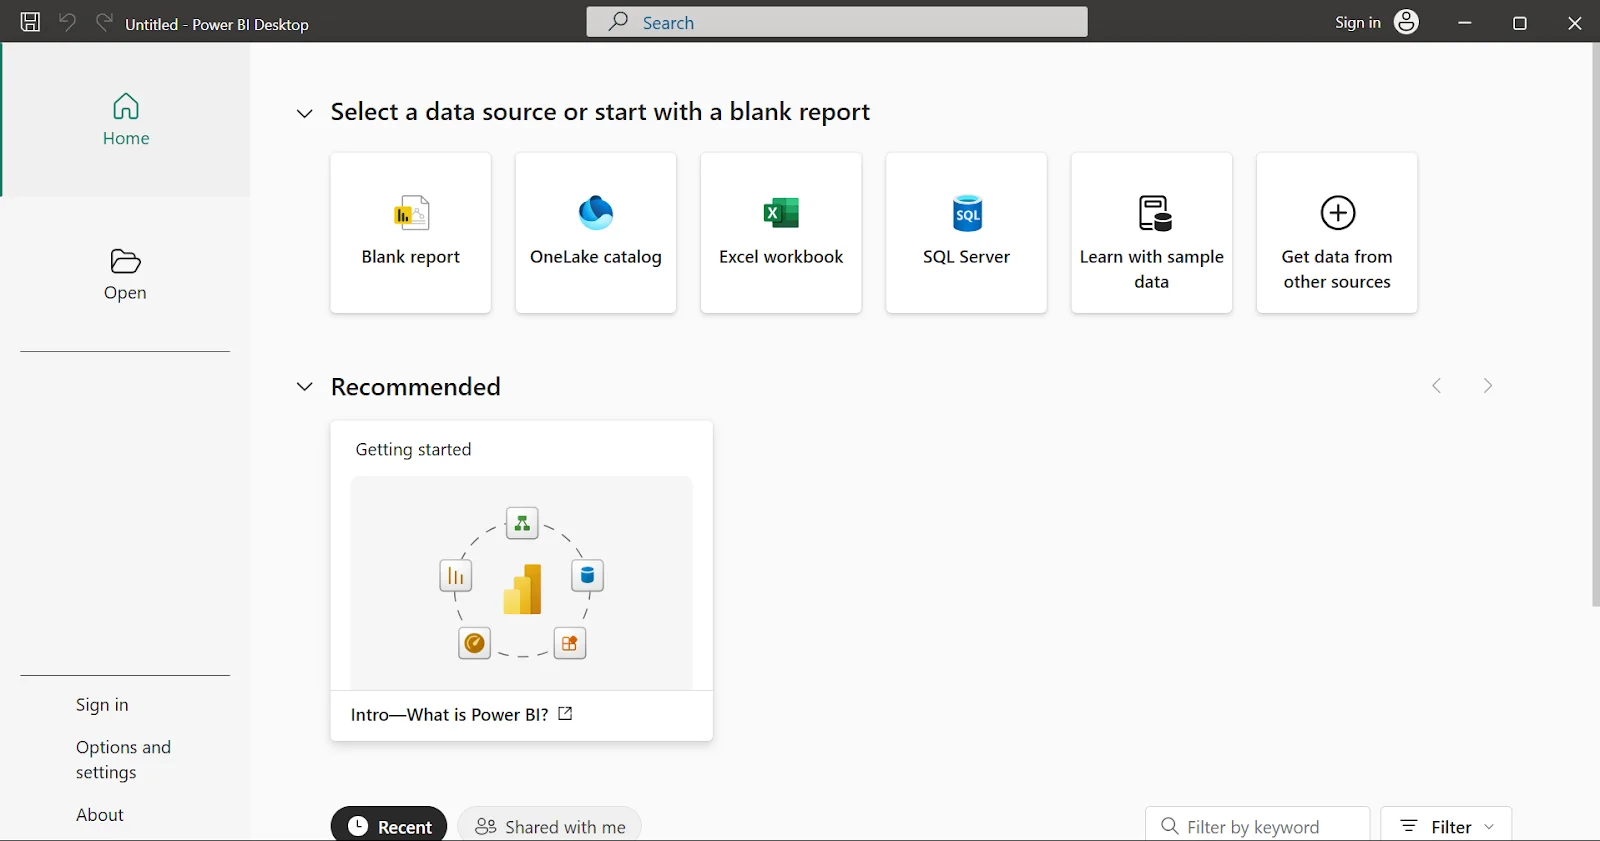
After the installation is complete, it's time to launch Power BI Desktop.
- Start Menu: Tap on the 'Start menu', which is in the lower-left corner of the screen. Swipe through the list containing installed apps to find 'Microsoft Power BI Desktop'. Click to launch the app.
- Desktop Shortcut: Double-click on the 'Power BI Desktop' icon on the desktop to open the app.
- Taskbar: Power BI Desktop can be pinned to the taskbar for quick access. Right-click on the 'Power BI Desktop' icon (in the Start menu/ on the desktop) > select 'Pin to taskbar'.
Step 4: Initial Setup & Configuration
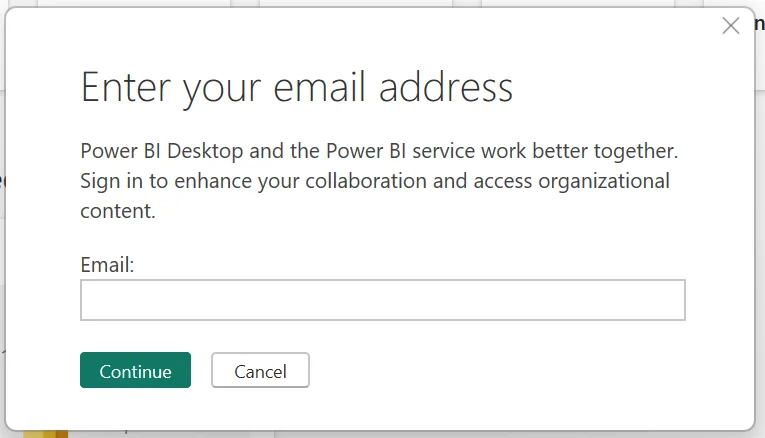
When launching Power BI Desktop for the very first time, it may prompt the user to sign in with a Microsoft account. Those having a Power BI account can enter their credentials and sign in. Those who do not have an account can create one for free.
Step 5: Exploring Power BI Desktop
Now that Power BI Desktop is installed and running, it is easy to begin exploring its features.
- Connect to Data Sources: Tap on the 'Get Data' button available on the 'Home' tab. This will connect to multiple data sources such as SQL Server, Excel, Azure, and others.
- Transform & Clean Data: Utilize Power Query Editor to transform, shape and clean the data to mold it as per the analysis requirements.
- Create Visualizations: Drag and drop required fields onto the report canvas. This will help create graphs, charts, visualizations and tables.
- Build Reports: Amalgamate various visualizations into a unified report. To this, add filters and then customize the layout to fit the needs.
- Publish Reports: Once the report is ready, it can be published to the Power BI Service to be shared and help in collaboration.
Step 6: Keeping Power BI Desktop Updated
Microsoft keeps on releasing updates for Power BI Desktop frequently. This adds new features, improves performance and fixes bugs.
Updates will be installed automatically for those who have downloaded this from the Microsoft Store.
One will have to manually check for updates if Power BI Desktop has been downloaded directly from the Power BI website. Open Power BI Desktop > go to the 'Help' menu > tap on 'Check for Updates'. The prompts should be followed to download and install the current version.
Related Article - Power BI Tutorial
Wrapping Up
With the comprehensive explanation of this guide, it is a straightforward method to download and install Power BI Desktop. Installing this tool can be beneficial to anyone working or wanting to work in a data-related field. If you are also one of them, use this guide to set up the environment and master this tool to achieve your goals. You can also refer to a Power BI Tutorial to get started with this platform.
FAQs
Q1. Is Power BI better or Tableau?
Both of these tools process data and extract valuable insights, but use different approaches. Power BI is designed to create a real-time dashboard or reports for real-time data processing and insights. However, Tableau is best when it comes to managing work with humongous datasets.
Q2. Which version of Power BI is best?
This totally depends on your requirements. Power BI Free is the best option for beginners. Power BI Pro will be a great choice for sharing and collaboration. Power BI Premium is the best choice for large organizations to manage complicated data.
Q3. How much does Power BI cost?
Power BI offers different pricing plans, including free, Pro for $14 and Premium for $24. There is also a Premium per capacity SKU option, starting at $4,995 per month, for more powerful resources.
Course Schedule